

Whirlpool 4396006RW Genuine OEM Dryer Vent Elbow Connector, 90-Degree Close-Turn, 4-Inch Aluminum Space-Saver Accessory
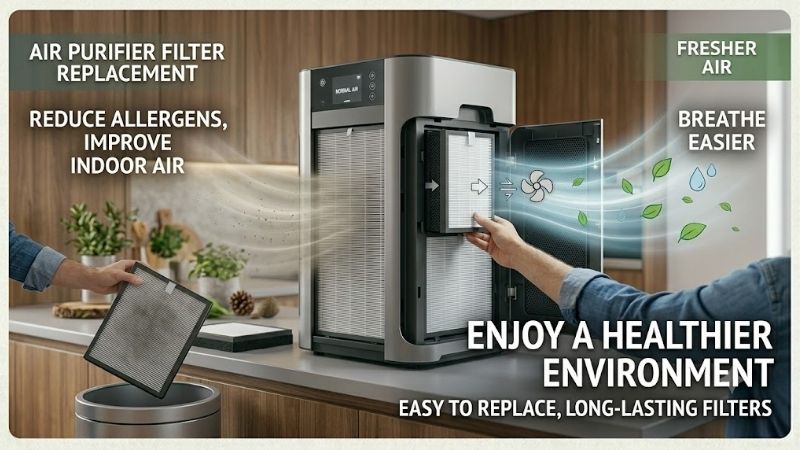
Air purifier filter replacement is a mandatory task if you want to protect your home’s air quality and keep your family breathing clean, allergen-free air. Many homeowners struggle with knowing exactly when and how to swap out their dirty, clogged filters, often leading to reduced appliance efficiency and higher energy bills. Whether you are dealing with a standard HEPA filter, an activated carbon sheet, or a specialized pre-filter, we have got you covered with professional tips and clear instructions to make the process completely seamless. Keep reading to discover how to revitalize your indoor air today.
The Crucial Role of Regular Air Purifier Filter Replacement in Your Home
Maintaining a clean filtration system is not just about keeping the machine running; it is a fundamental aspect of managing your home’s overall environmental health. When you neglect this simple task, your air quality degrades rapidly, allowing pollutants to recirculate freely throughout your living spaces.
Common Visual and Physical Signs That Your Air Filter is Clogged
The first and most obvious indicator that you need a replacement is a visible layer of gray dust and debris on the filter surface. Traditional HEPA filters start as bright white, but over months of continuous operation, they trap millions of microscopic particles, turning a dark, charcoal gray. If you notice a thick blanket of lint or pet hair blocking the intake grilles, it is a clear sign that the internal media is completely saturated and can no longer capture fine particulates.
Beyond visual cues, you should pay close attention to the airflow coming out of your unit’s exhaust vent. When the filter is packed with pollutants, the fan has to struggle to push air through the dense, obstructed fibers, resulting in a noticeably weaker breeze. If your machine is running on its highest speed but barely moving any air, the internal elements are choked and require your immediate attention.
Finally, the return of persistent indoor odors or a sudden flare-up of seasonal allergy symptoms can signal that your current filter has reached the end of its lifespan. When the active carbon layer becomes fully saturated, it can no longer absorb volatile organic compounds or cooking smells, causing them to linger in your rooms. If you or your family members start sneezing more frequently, it is time to inspect your unit.
Why Delaying Your Air Purifier Filter Replacement Damages Indoor Air Quality
When you postpone changing your filters, you are essentially turning your air cleaning device into a passive dust circulator. Over time, the accumulated dust, pollen, and pet dander trapped within the filter fibers begin to degrade and break down under the constant pressure of the fan. This can cause microscopic particles to break free from the filter media and blow back directly into your breathing zone.
Breathing in these highly concentrated allergens can lead to severe long-term respiratory issues, chronic fatigue, and poor sleep quality. For children, the elderly, or anyone suffering from asthma, the consequences of a neglected air purifier are particularly severe. Regularly refreshing your filtration system ensures that your home remains a safe, healthy sanctuary from outdoor pollution.
How an Overworked Motor Increases Your Monthly Utility Bills
An air purifier is designed to run continuously, but it is engineered to do so under specific aerodynamic conditions. When the filter becomes heavily obstructed, the internal electric motor must work twice as hard to draw air through the restricted channels. This increased mechanical resistance causes the motor to draw significantly more electrical current from your wall outlets, quietly spiking your monthly power bills.
In addition to the immediate financial impact of higher utility costs, the excessive strain placed on an overworked motor will drastically shorten the lifespan of your appliance. The motor will run much hotter than intended, leading to premature wear on the bearings and electrical components. What could have been a simple, affordable filter swap can quickly escalate into a complete system failure, forcing you to purchase a brand-new machine.
By investing in a timely replacement, you are not only safeguarding your physical health but also protecting your financial investment in your home appliances. A clean filter allows the motor to glide effortlessly at its designed RPM, consuming the minimum amount of power while delivering maximum clean air delivery rates. Keeping your system optimized is a win-win for both your wallet and your health.
Essential Preparation and Tools for an Easy Air Purifier Filter Replacement
Before you begin the process of opening your appliance, taking a few minutes to gather the correct tools and prepare your workspace will make the entire project much smoother and cleaner. Proper preparation prevents dust from escaping into your clean room and ensures you do not accidentally damage the delicate internal sensors of your machine.
Three Catchy Titles to Guide Your Home Maintenance Schedule
To help you organize your seasonal home maintenance logs, we have created three highly effective titles that capture the spirit of this straightforward DIY project. The first title option is “How to Change Your Air Purifier Filter the Easy Way,” which is perfect for a quick reference guide or a digital calendar reminder. This title emphasizes the simplicity of the task, helping you overcome procrastination.
The second catchy title suggestion is “Step-by-Step Guide to Fresh Home Air: Simple Filter Maintenance,” which focuses on the rewarding outcome of the process. This title serves as an excellent header for your home care binder, reminding you of the immediate health benefits your family will enjoy. It frames the maintenance task as a positive, proactive step toward a healthier lifestyle.
The third and final title recommendation is “The Ultimate Guide to Hassle-Free Filter Replacements,” which is designed for comprehensive troubleshooting manuals. This title is ideal if you want to keep a detailed record of different filter types, model numbers, and purchase dates for multiple rooms. Whichever title you choose for your records, keeping a dedicated log ensures you never miss a critical swap.
The Ultimate Checklist of Tools and Materials to Gather First
You do not need any advanced technical skills or specialized mechanical tools to complete this maintenance project successfully. However, having a few basic household items on hand will prevent a messy cleanup and protect your machine from accidental scratches. First and foremost, you must ensure you have the correct, manufacturer-approved replacement filter ready to go. You should always look up authentic replacement filters on Amazon to guarantee compatibility and avoid cheap, poorly fitting counterfeits.
In addition to the new filter, you will need a high-quality cleaning cloth to wipe down the dusty interior of the cabinet. You should choose a professional microfibre cloth like the top-rated options on Amazon to avoid scratching the sensitive infrared air quality sensors located inside the housing. A gentle, dry wipe is usually all that is required to remove static dust without damaging the electrical components.
Critical Safety Measures and Workspace Preparation Steps
Safety should always be your top priority when performing any maintenance on an electrical appliance in your home. Before you even touch the outer housing of your air purifier, make absolutely sure that the power cord is completely unplugged from the wall outlet. Simply turning the machine off using the digital power button is not enough, as the internal sensors and automatic timers can still trigger the fan motor.
For individuals who suffer from severe allergies, asthma, or chemical sensitivities, we highly recommend wearing a protective dust mask and lightweight gloves during the replacement process. Handling a heavily clogged filter can release a concentrated cloud of biological allergens, which can trigger immediate sneezing or respiratory discomfort. Protecting yourself ensures the project remains a safe and pleasant experience.
Executing Your Air Purifier Filter Replacement with Confidence
Now that you have gathered your tools, prepared your workspace, and taken the necessary safety precautions, you are fully ready to perform the physical replacement. Following a structured, methodical approach will ensure that the new filter is sealed correctly and that your machine’s electronic monitoring systems are accurately reset for the next cycle.
Our Simple Step-by-Step Instructions for a Flawless Replacement
Replacing your filter is a remarkably straightforward process when you break it down into clear, manageable steps. By following this structured sequence, you will ensure a perfect seal and restore your machine to its original factory performance in no time. Let us walk through the complete physical procedure from start to finish.
- Step 1: Disconnect the power completely. Double-check that the cord is unplugged and place the purifier on your prepared flat surface.
- Step 2: Remove the front or side panel. Gently press the release latches on the housing to detach the outer cover, setting it carefully aside.
- Step 3: Slide the old filter out. Slowly pull the dusty filter straight out of its slot, placing it directly into your plastic garbage bag immediately.
- Step 4: Clean the internal cabinet. Use your dry microfibre cloth to wipe away any accumulated dust from the interior walls and sensor windows.
- Step 5: Verify the airflow direction. Locate the directional arrows printed on the side of your new filter, aligning them with the machine’s actual airflow.
- Step 6: Insert the new filter. Slide the fresh filter firmly into the housing, ensuring there are no gaps around the edges where unfiltered air could leak.
- Step 7: Reattach the cover and reset. Snap the outer panel back into place, plug in the power cord, and hold down the filter reset button for three seconds.
Once the indicator light blinks and turns off, your air purifier’s internal timer is successfully reset to zero, and the machine is ready to deliver fresh air. Running the unit on its highest fan speed for the first thirty minutes will quickly clear out any minor dust disturbed during the process. This simple routine guarantees optimal performance.
Weighing the Clear Pros and Cons of a DIY Air Purifier Filter Replacement
Before committing to a regular maintenance schedule, it is highly valuable to weigh the specific benefits and drawbacks of performing a DIY air purifier filter replacement. On the positive side, performing this simple task yourself is incredibly cost-effective compared to hiring a professional appliance technician. It takes less than ten minutes of your time, gives you complete control over the quality of the replacement parts used, and ensures your indoor air remains consistently purified at a medical-grade level of efficiency.
On the negative side, buying replacement filters represents an ongoing financial commitment that can range from $30 to $100 per year, depending on your specific model. Additionally, handling the dusty, dirty filters during the swap can be slightly messy and may trigger mild allergic reactions if you do not take the proper precautions. Finally, disposable filters eventually contribute to plastic and paper waste in municipal landfills, which can be a concern for highly eco-conscious homeowners.
Fortunately, many of these minor drawbacks can be easily mitigated with smart shopping and proper planning. For instance, you can significantly reduce your annual maintenance expenses by purchasing high-quality, third-party compatible filters in bulk packs. To find the most cost-effective deals and bundle packages for your specific machine, browse the extensive selection of budget-friendly replacement filters on Amazon today.
Pro Tips to Extend Your New Filter Life and Maintain Fresh Air
To get the absolute most value out of your newly installed filter, there are several expert tips you can implement to extend its useful lifespan. First, always make sure to vacuum the outer mesh pre-filter every two weeks using a soft brush attachment. This simple step removes large pet hair and lint before they can penetrate and clog the delicate, expensive HEPA fibers inside. Second, never use water or liquid cleaners on a paper HEPA or carbon filter, as moisture will instantly destroy the static electrical charge and physical structure of the media.
In conclusion, keeping up with a consistent air purifier filter replacement schedule is the single most effective action you can take to guarantee fresh, healthy, and pristine indoor air for your family. By following our practical, step-by-step guide and investing in high-quality maintenance tools, you protect your valuable home appliances and your physical health simultaneously. If you are ready to revitalize your living space, explore the top-rated replacement filters on Amazon today to find the perfect match for your specific air purifier model.
Top picks from this guide
 LHHXX33Dryer Vent Hose - 4 inch Flexible Duct, 8ft Long,…$9 \xc2\xb7 98/100Whirlpool 4396006RW Genuine OEM Dryer Vent Elbow Connector, 90-Degree Close-Turn,…$8 \xc2\xb7 98/100
 XANGNIERXANGNIER 5 Pack Dryer Vent Cleaner Kit,Flexible Dryer Lint Brush…$10 \xc2\xb7 97/100
 SealegendSealegend 40 Feet Dryer Vent Cleaner Kit/Lint Remover/Upgraded Flexible Quick-Snap…$27 \xc2\xb7 96/100


Write Your Review
No reviews yet. Be the first to share your experience!