
Frost King ACF19 Foam Coil Cleaner, 1.18 Pound (Pack of 1), 19 Ounce

Roebic K-97 Liquid Main Line Cleaner with Bacteria Enzymes, Eliminates Organic Buildup in Sewer/Septic System and Protects from Clogs, Safe for Bathroom Toilet, 32 fl oz
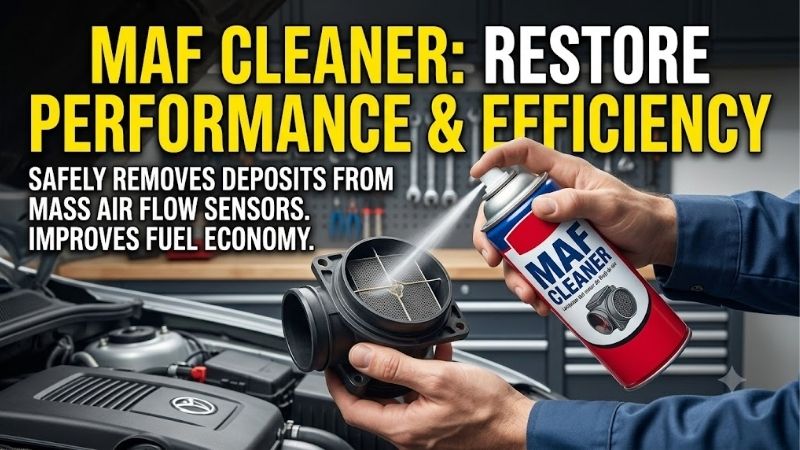
Maf cleaner is the ultimate tool you need to restore your car’s engine performance and fuel efficiency today. Many drivers struggle with rough idling, sluggish acceleration, and unexpected check engine lights without realizing that a dirty mass air flow sensor is the main culprit. This comprehensive guide will help you solve this issue so easily!
Understanding Your Mass Air Flow Sensor and Choosing a MAF Cleaner
Before you roll up your sleeves and grab your tools, you must understand what this critical component does under the hood and why using a specialized spray is so important. Many car owners make the expensive mistake of neglecting this sensor or using the wrong cleaning chemicals. If you are planning to write or follow a DIY guide, you might find inspiration from these three highly optimized, catchy search engine titles: How to Clean Your MAF Sensor the Easy Way, Step-by-Step Guide: Cleaning Your Mass Air Flow Sensor Safely, or How to Use MAF Cleaner to Restore Your Engine Performance.
What is a MAF Sensor and Why Does It Get Dirty?
The Mass Air Flow (MAF) sensor is a vital electronic component located in your car’s air intake system. Its primary job is to measure the exact amount of air entering the engine so the computer can calculate the perfect ratio of fuel to inject into the combustion chambers. When the sensor works correctly, your car runs smoothly, delivers optimal gas mileage, and produces minimal emissions.
Over time, however, the delicate hot wire or plate inside the sensor housing becomes coated with microscopic debris. This contamination comes from airborne dust that slips past your air filter, oily vapor from the crankcase ventilation system, and general road grime. When these particles bake onto the hot wire, they insulate it, causing the sensor to send incorrect air-flow data to your vehicle’s engine control module.
Essential Tools You Need to Clean Your MAF Sensor Safely
To complete this simple maintenance project successfully, you must assemble a few basic tools beforehand. Working with sensitive automotive electronics requires the right equipment to ensure you do not cause accidental damage to your vehicle. Preparing these items in advance will make the entire cleaning process smooth, efficient, and completely stress-free.
First and foremost, you will need a dedicated can of mass air flow sensor cleaning spray to dissolve stubborn contamination. You should also choose a premium screwdriver set or a set of safety Torx bits, as many modern vehicle manufacturers use specialized security screws to secure the sensor housing to the intake tube. Additionally, having a pair of protective nitrile gloves and safety glasses is highly recommended to shield your skin and eyes from strong chemical solvents. Finally, you should select a set of ultra-soft, lint-free microfiber towels to clean the surrounding plastic intake parts without leaving any stray fibers behind.
The Pros and Cons of Using a Dedicated MAF Cleaner
Using a specialized cleaning spray is by far the most cost-effective way to restore engine performance, but you must weigh the benefits against the precautions. On the positive side, a dedicated spray is engineered to dissolve baked-on oil and dust instantly without leaving any chemical residue behind. It evaporates almost immediately upon contact, which minimizes the risk of short-circuiting the sensitive electrical elements inside the housing. By spending less than $10 on a quality can of spray, you can easily save upwards of $150 to $300 on a complete replacement sensor at a local mechanic.
On the other hand, these specialized chemical solvents are extremely volatile, highly flammable, and emit strong, toxic fumes. You must always work in a well-ventilated outdoor area far away from open flames, sparks, or hot engine parts. Furthermore, the chemical spray cannot repair a sensor that has suffered a permanent internal electrical failure or a broken hot wire. If the delicate wire is already physically damaged, spraying it will not bring it back to life, and you will eventually need to purchase a brand-new replacement unit.
The Step-by-Step Guide to Cleaning Your MAF Sensor Like a Pro
Now that you have gathered your essential tools and understand the chemical properties of your cleaning spray, you are ready to begin. Cleaning this sensor is a straightforward process that takes less than thirty minutes from start to finish. By following these precise, active steps, you can eliminate rough idling, restore throttle response, and keep your vehicle operating at peak efficiency.
Step 1: Locating and Accessing Your MAF Sensor Under the Hood
Begin by parking your vehicle on a flat, level surface in a well-lit area, turning off the ignition, and pulling the hood release lever. For your safety, let the engine cool down completely for at least twenty minutes to avoid burning yourself on hot radiator hoses or metal engine components. Once the engine is cool, disconnect the negative terminal of your car battery to prevent any electrical short circuits or warning codes during the procedure.
Now, look at your engine bay and locate the air filter box, which is usually a large plastic housing on the side of the engine compartment. The sensor assembly is typically positioned along the plastic intake tube that runs directly from the air filter box to the engine’s throttle body. It is easily identified by an electrical wire harness plugged into a small plastic block mounted on the air intake duct.
Step 2: Safe Removal of the Sensor Housing
Gently press down on the plastic locking tab of the electrical connector plugged into the sensor and pull it straight backward to detach it. Be extremely careful when handling these plastic clips, as engine heat can make them brittle and prone to snapping off under pressure. Once the harness is safely disconnected, tuck it out of the way to prevent any dust or cleaner from getting inside the electrical pins.
Using your screwdriver or safety Torx bits, carefully remove the mounting screws that hold the sensor in place on the air intake tube. Keep a close eye on these small screws so they do not fall down into the deep, dark corners of the engine bay. Once the screws are removed, gently grasp the plastic body of the sensor and pull it straight out of the intake tube with a slight twisting motion, making sure not to drag the delicate internal elements against the sides of the mounting hole.
Step 3: Spraying the Sensor and Letting It Dry Completely
Hold the removed sensor carefully by its plastic outer body, ensuring your fingers never touch the exposed wires or the small bead-like sensor element inside the flow tube. Shake your can of cleaning spray thoroughly, hold it about four to six inches away from the sensor, and spray ten to fifteen short, powerful bursts directly onto the dirty wires. Make sure to spray the cleaning fluid from multiple angles to wash away all traces of dust, oil, and carbon buildup.
Once the sensor is thoroughly wet, place it down gently on a clean, dry microfiber towel in a dust-free area and let it air-dry completely. Do not use compressed air, hair dryers, or cloths to speed up the drying process, as the high pressure or contact will instantly destroy the fragile internal wires. Allow the sensor to sit undisturbed for at least twenty to thirty minutes, ensuring every drop of the fast-evaporating solvent has completely vanished before you reinstall it.
Pro Tips and Crucial Mistakes to Avoid During the Cleaning Process
While cleaning this sensor is an incredibly easy task, it is also very easy to ruin the delicate electronics if you are careless. Understanding the common pitfalls of this procedure will help you avoid expensive mistakes and ensure your vehicle runs perfectly. Keep these expert tips and warnings in mind to achieve the absolute best results from your DIY maintenance session.
Pro Tips for the Best Results with Your MAF Cleaner
To maximize the longevity of your clean sensor, you should always inspect and clean your vehicle’s air filter box during this process. If your air filter is clogged with dirt, leaves, or bugs, it will immediately contaminate your newly cleaned sensor as soon as you start the engine. Replacing a dirty air filter with a high-quality replacement is a simple upgrade that ensures only clean, particulate-free air flows past the delicate sensor.
Another excellent habit is to schedule this simple cleaning process whenever you perform a routine engine air filter replacement. Typically, cleaning the sensor every ten thousand to fifteen thousand miles will keep your fuel economy high and prevent carbon buildup from hardening. Regular maintenance prevents the performance degradation that slowly robs your vehicle of horsepower and throttle response over time.
Fatal Mistakes That Will Destroy Your Delicate MAF Sensor
The single most critical warning for this entire project is to never, under any circumstances, touch the delicate sensor wires with anything other than the chemical spray. Do not use your fingers, cotton swabs, rags, or brushes to scrub the grime off, as these wires are thinner than a human hair and will snap instantly under the slightest physical contact. If you touch the wire and break it, the sensor will be ruined permanently, forcing you to buy a brand-new replacement.
Additionally, you must never use alternative household or automotive cleaners like brake cleaner, carburetor cleaner, WD-40, or rubbing alcohol. These harsh chemicals are formulated with oily lubricants or corrosive solvents that will coat the sensitive wires, damage the delicate plastic housing, or leave behind a thick residue. This unwanted residue will trap even more dust and grime immediately, causing your engine to run worse than it did before you started cleaning.
How to Verify if Your Cleaning Was Successful
Once the sensor is completely dry, insert it carefully back into the intake tube, tighten the mounting screws, and reconnect the electrical wire harness. Reattach the negative battery cable tightly, close the car hood, and turn on the ignition key to start the vehicle. Let the engine idle smoothly for a few minutes while you observe the dashboard for any active warning lights or unusual vibrations.
Take your vehicle for a quick, fifteen-minute test drive on various roads to evaluate the engine response, acceleration, and shifting patterns. You should notice an immediate improvement in throttle responsiveness, a much smoother idle at red lights, and the disappearance of any engine hesitation. If you had an active check engine light before the cleaning, you can use a basic OBD2 scanner to clear the old trouble codes and verify that they do not return.
Conclusion: Keep Your Engine Running Clean with the Best Tools
Taking care of your car does not have to involve expensive trips to the mechanic or overpriced diagnostic fees. Using a high-quality maf cleaner is a fast, safe, and highly effective way to restore your engine’s power, cure rough idling, and improve your vehicle’s overall fuel economy. Make sure to stock up on premium cleaning sprays, precision Torx screwdrivers, and ultra-soft microfiber cloths before you begin your project. Head over to Amazon today to explore the highest-rated automotive maintenance tools and cleaning kits so you can complete this simple upgrade with absolute confidence!
Top picks from this guide
Thermwell Products Co., IncFrost King ACF19 Foam Coil Cleaner, 1.18 Pound (Pack of…$6 \xc2\xb7 98/100 VitalOxideVital Oxide Disinfectant, Deodorizer, Cleaner, Food-Contact Sanitizer, Virucide – (EPA…$30 \xc2\xb7 98/100
 OasisOasis Biocompatible Dish Soap Liquid & All Purpose Cleaner -…$40 \xc2\xb7 98/100
 Isopure_WaterIPWINDUSTRIESIPW Industries, Inc. - Sani System (SS24N) Liquid Cleaner for…$12 \xc2\xb7 95/100


Write Your Review
No reviews yet. Be the first to share your experience!