
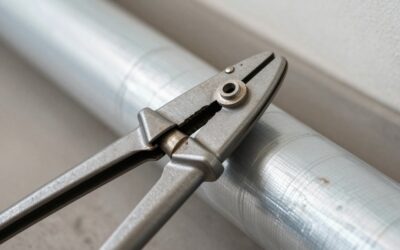
When joining round sheet metal ducting, stovepipes, or fitting flexible transitions, the quality of your crimp determines whether a joint slips together seamlessly or turns into a buckled, leaky nightmare. Duct crimpers—often called pipe crimpers or sheet metal indenters—are designed to reduce the circumference of sheet metal pipe ends so they slide neatly into male or female connections. While the tool appears straightforward, subtle differences in jaw geometry, steel tempering, and handle linkage separate trade-trade tools from budget options that fail mid-job.
Selecting the right tool requires understanding sheet metal gauges, blade configurations, and physical leverage mechanisms. As jobsite demands and efficiency expectations continue to evolve in 2026, choosing a durable pair of hand crimpers saves significant labor hours and prevents air leakage that can derail system performance testing. This guide breaks down the core specifications that actually impact real-world duct installation so you can invest in the right tool for your workflow.
As an Amazon Associate we earn from qualifying purchases at no extra cost to you.

Understanding Blade Count: 3-Blade vs. 5-Blade Configurations
The fundamental distinction among hand crimpers is the number of blades in the jaw head, usually configured as either a 3-blade or 5-blade mechanism. A 5-blade crimper features three upper blades and two lower blades, creating a series of smaller, closely spaced indentations around the pipe perimeter. This pattern produces a smooth, gradual reduction in pipe diameter, making it the industry standard for joining standard 26-gauge and 28-gauge round HVAC ductwork. The resulting joint slides easily into the un-crimped end of another pipe without requiring excess force or distorting the seam.
Conversely, a 3-blade crimper uses two upper blades and one lower blade, producing larger, deeper crimps spaced further apart. This design displaces more metal per squeeze, making 3-blade crimpers ideal for heavier materials, such as downspouts, stovepipe, or metal flashing where a shallow crimp would not yield enough circumference reduction. However, using a 3-blade tool on light-gauge sheet metal often creates overly aggressive folds that cause air gaps or prevent a tight seal. For general HVAC air duct installations, a 5-blade tool delivers the refined finish necessary for airtight connections.
Gauge Capacity and Steel Alloy Quality
Sheet metal thickness in HVAC ductwork ranges from thin 28-gauge material up to heavy 24-gauge or 22-gauge galvanized steel. Every crimper is rated for a specific maximum material thickness, and exceeding this capacity leads to dull blades, sprung handles, or outright mechanical failure. Standard hand crimpers are engineered to handle up to 24-gauge galvanized steel or 22-gauge aluminum, which covers almost all residential and light commercial supply and return lines.
The longevity of the tool depends heavily on the heat treatment and alloy used in the jaw construction. Look for blades forged from high-carbon steel or chrome-molybdenum alloy steel. Drop-forged jaws maintain sharp edges despite repetitive friction against zinc-coated galvanized steel. Milled or stamped steel jaws found on budget models degrade quickly, resulting in crushed metal edges rather than clean, precise crimps. If your daily work involves heavy-gauge industrial ducting or stainless steel pipes, verify that the jaws are explicitly hardened for those materials.
Mechanical Advantage and Ergonomic Leverage
Crimping metal requires applying significant force across multiple contact points simultaneously. To prevent hand fatigue during long runs of duct fabrication, a crimper must convert hand squeeze pressure into high crushing force at the jaw head. Modern HVAC crimpers achieve this through compound leverage linkage systems, which multiply hand input force through internal mechanical pivot points.
Beyond the internal mechanism, handle length and grip design play vital roles in daily usability. Longer handles provide greater physical leverage, making it significantly easier to crimp 24-gauge metal with one hand. Thermoplastic rubber (TPR) or cushioned vinyl grips absorb pressure across the palm, preventing sore spots during repetitive crimping. Additionally, a built-in handle latch that operates smoothly with one thumb allows you to keep the tool securely closed in your tool pouch without interrupting your movement on ladders or in tight crawl spaces.
Throat Depth and Crimp Uniformity
Throat depth refers to how far the metal can insert into the crimper jaw before hitting the physical stop. Standard duct crimpers feature a throat depth ranging from 1 to 1.5 inches. This depth governs how far back from the pipe edge the crimp indentation extends. A crimp that is too shallow will not provide enough friction surface for the joining pipe, leading to loose joints that can pull apart during system pressurization.
Consistency across the entire circumference of the pipe is critical for maintaining an airtight duct system. High-quality crimpers incorporate precise blade alignment stops that ensure every squeeze produces an identical depth of crimp. When working around the pipe, overlapping each squeeze by approximately half a blade width creates a continuous, uniform bevel. Inconsistent depth creates waves in the metal edge, which catch on the inner wall of the mating pipe and lead to damaged seams.
Common Selection Mistakes to Avoid
One of the most frequent mistakes installers make is buying a single pair of crimpers and assuming it fits every jobsite scenario. Using a standard 5-blade HVAC crimper on heavy-gauge spiral pipe fittings will quickly spring the pivot pins and ruin blade alignment. Always match the tool capacity to the heaviest metal gauge you expect to encounter on site.
Another common error is prioritizing low cost over compound leverage mechanisms. Single-pivot crimpers require maximum hand force for every single squeeze, leading to rapid muscle exhaustion and sloppy, incomplete crimps by the end of the shift. Investing in a compound-leverage tool pays off immediately in installation speed and physical comfort. Finally, avoid tools with flimsy plastic thumb locks that slip closed mid-squeeze, as this disrupts your rhythmic movement around the duct perimeter.
When to Consider Power Crimping Attachments
While traditional hand crimpers are essential for detail work and field adjustments, high-volume fabrication demands greater speed. Drill-powered or impact-driver crimping attachments have become popular for shop fabrication and extensive duct installation projects. These attachments connect directly to a cordless impact driver, using rotating gear blades to crimp sheet metal as you guide the pipe through the head.
Power attachments process pipe far faster than hand tools and eliminate hand fatigue entirely. However, they lack the delicate control of hand crimpers and require a learning curve to prevent chew-ups on thin-gauge sheet metal. For most field technicians, keeping a premium pair of hand crimpers on the belt alongside an impact attachment in the tool bag offers the best balance between rapid production and precise hand control.
Related Guides
To see how top-performing sheet metal tools stack up in real-world testing, check out our complete breakdown of the best duct crimpers for sheet metal HVAC work, where we evaluate durability, blade precision, and ergonomic design.
FAQ
Should I use a 3-blade or 5-blade crimper for standard residential HVAC ductwork?
A 5-blade crimper is the best choice for standard residential sheet metal ducting. It creates smaller, more uniform indentations that allow 26-gauge and 28-gauge round pipes to slide together smoothly without buckling. A 3-blade model is generally reserved for heavier materials like downspouts or stovepipes.
Can I use hand duct crimpers on stainless steel pipes?
You can use hand crimpers on thin stainless steel, provided the metal gauge falls within the tool’s rated capacity. However, because stainless steel is significantly harder than galvanized steel or aluminum, it will wear down blade edges much faster. If you frequently work with stainless steel, select crimpers specifically rated with hardened chrome-moly jaws.
How far should I overlap each squeeze when crimping ductwork?
For the cleanest and most consistent crimp, overlap each squeeze by roughly half the width of the crimper jaws. Moving in a steady circle around the pipe edge ensures an even circumference reduction without leave flat spots. Overlapping too little results in irregular ridges that make joining two pipes difficult.
Why is my crimped duct joint still loose after connecting?
A loose joint usually occurs when the crimp depth is too shallow or the tool did not displace enough metal. Ensure you are pushing the sheet metal all the way into the jaw throat before squeezing. If you are working with heavier 24-gauge metal, a 5-blade crimper may require firmer pressure or an additional pass to achieve adequate reduction.



Write Your Review
No reviews yet. Be the first to share your experience!