
Frost King ACF19 Foam Coil Cleaner, 1.18 Pound (Pack of 1), 19 Ounce

Roebic K-97 Liquid Main Line Cleaner with Bacteria Enzymes, Eliminates Organic Buildup in Sewer/Septic System and Protects from Clogs, Safe for Bathroom Toilet, 32 fl oz
Air filter cleaner solutions are necessary for maintaining standard HVAC efficiency and improving indoor air quality. Many homeowners do not realize that keeping these components clean can extend system life. This easy, step-by-step guide walks you through the entire maintenance process safely. Learn to restore your filter like a true professional.
Essential Preparations and Tools for Your Air Filter Cleaner Process
To begin your home HVAC maintenance journey, you must gather the appropriate tools and understand the basic principles of system preparation. Many property owners rush into cleaning their ventilation elements without understanding that using the wrong chemicals or tools can permanently degrade the filter’s synthetic fibers. Preparing your workspace and acquiring specialized, safe equipment ensures that you will not have to purchase an expensive replacement unit prematurely. This introductory phase sets the foundation for a seamless, damage-free restoration process.
What You Will Need to Clean Your System Safely
Before you begin the cleaning process, you must gather several household items and specialized tools to ensure the job is done right. Having everything prepared beforehand prevents unnecessary trips to the garage and keeps your cleaning workspace highly organized. You will need a clean, flat surface to work on, preferably outdoors or in a well-ventilated utility area where water can drain freely without making a mess.
The core tools for this task include a soft-bristle nylon brush, a low-pressure garden hose or spray sink, and clean microfiber cloths. Using a high-pressure washer must be avoided at all costs because the intense water force can easily rip the delicate mesh fibers. For drying, having a clean rack or a large bath towel is essential to ensure moisture is fully wicked away from the core frame.
You should choose a professional microfibre cloth like those designed specifically for delicate surfaces to avoid damaging the outer borders. Paired with a proper cleaning agent, these accessories will make your monthly maintenance routine much faster and highly efficient. (Check the latest price on Amazon here) to secure all your essential home maintenance accessories in one convenient package.
The Best Air Filter Cleaner Products and Accessories
Choosing the right cleaning solution is the most critical decision in this entire maintenance guide. Many homeowners make the mistake of using harsh household bleach, acidic bathroom sprays, or abrasive dish soaps to clean their HVAC elements. These aggressive detergents strip away the specialized electrostatic coatings that allow modern washable filters to capture fine dust particles.
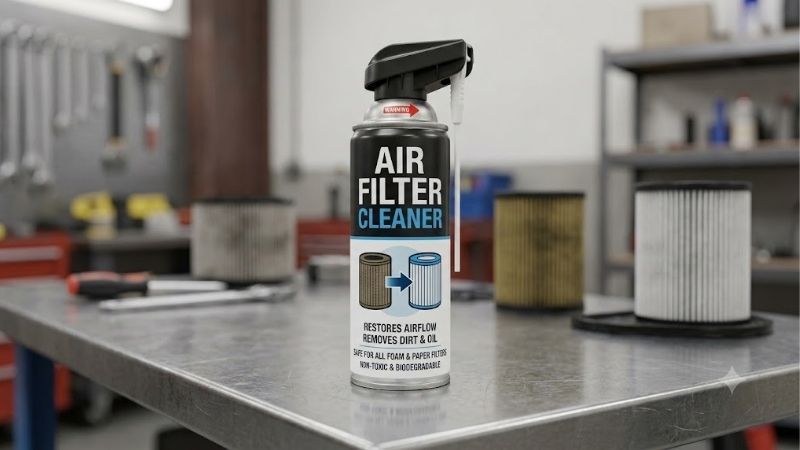
A specialized chemical solution is formulated to break down sticky grease, pollen binder, and heavy soot without degrading the synthetic fibers of your filter. These commercial sprays are typically biodegradable, rinse away easily with plain water, and leave zero chemical residues behind. They are incredibly simple to apply and work within minutes to dissolve stubborn layers of gray grime.
If you are looking for a reliable product that safely restores your washable unit’s electrostatic properties, investing in a dedicated spray is highly recommended. (View this high-grade air filter cleaner on Amazon) to find a solution that guarantees a deep, professional clean. This simple addition to your utility closet will save you both time and physical effort during your next scheduled HVAC cleanup.
Safety Precautions Before Beginning Your Maintenance Work
Safeguarding yourself and your household machinery is of paramount importance whenever you perform any DIY home maintenance tasks. Before you touch any vents or filter grilles, you must turn off your entire heating and cooling system. Running your HVAC unit without a filter in place—even for a few minutes—allows heavy dust and airborne debris to settle directly onto your sensitive blower coils.
Additionally, you should wear basic personal protective equipment, such as safety glasses and a simple dust mask, when handling dirty ventilation components. When you slide the dirty filter out of its metal housing, thousands of microscopic particles, pet dander, and mold spores are easily dislodged. Wearing a mask prevents you from inhaling these concentrated allergens during the initial handling.
Finally, make sure that your workspace is entirely free of electrical hazards, especially if you are using water hoses indoors. If you must wash your filter in a bathtub or utility sink, clear away any electrical appliances and ensure the surrounding floor is dry. Taking these simple precautions ensures a safe, successful project that keeps your home running smoothly.
The Step-by-Step Guide to Using Your Air Filter Cleaner Properly
Washing your home HVAC filter is a straightforward process when you break it down into logical, easy-to-manage stages. This structured method prevents you from damaging the internal media and ensures that every speck of deeply embedded dust is thoroughly rinsed away. By adhering to this professional sequence, you will preserve the electrostatic charge of your filter and keep your home’s air flowing freely. Let us explore the step-by-step instructions required to achieve a pristine, manufacturer-quality clean.
Step-by-Step Instructions: Initial Removal and Preparation
- Power down your system: Locate your home’s main thermostat and switch the HVAC setting to “Off” to ensure the blower fan does not activate while you are working.
- Remove the intake grille: Use a flathead screwdriver or release the manual latches on your return vent to carefully swing the metal door open.
- Extract the filter gently: Slide the dusty filter out of its channel slowly, keeping it horizontal to prevent large clumps of dust from falling onto your carpets.
- Vacuum the heavy debris: Use your vacuum’s soft brush attachment to gently sweep away the thickest layers of pet hair and lint from the intake side before applying any liquid.
This initial preparation phase is essential for preventing the dust from turning into a thick, muddy paste once you apply your wet cleaning agents. Vacuuming the dry surface first makes the subsequent washing step significantly cleaner and much faster. It also protects your utility sink from becoming clogged with excessive amounts of pet hair and household debris.
Always take a moment to inspect the frame of your filter for any signs of physical cracking, warping, or tearing during this stage. If the structural borders are compromised, washing will not restore its efficiency, and you should opt for a brand-new unit instead. If the unit is structurally sound, you are ready to proceed to the main washing phase.
Step-by-Step Instructions: Washing and Spraying the Media
- Apply the cleaning solution: Generously spray your specialized formula over the entire surface of the filter, focusing heavily on the side where the air enters.
- Allow the chemical to work: Let the active solution sit on the synthetic fibers for approximately 10 to 15 minutes to fully dissolve oily residues.
- Rinse with low-pressure water: Run lukewarm water through the filter in the opposite direction of normal airflow to flush the trapped dirt out of the media.
- Brush stubborn areas gently: Use your soft-bristle brush in light, circular motions to loosen any remaining spots of grease or caked-on soot.
During the rinsing step, it is vital to remember that water should always flow from the clean side to the dirty side. This reverse-flushing technique pushes the trapped dust out of the fiber grid rather than forcing it deeper into the material. Keep rinsing until the water draining from the filter is completely clear and free of suds.
If your filter has not been cleaned in several months, you may need to repeat the spraying and rinsing cycle a second time to remove stubborn discoloration. Never use boiling water, as high heat can warp the plastic framing and melt the fine synthetic weaves. A thorough, gentle rinse is all it takes to restore peak airflow capabilities.
Step-by-Step Instructions: Drying and Reinstallation Procedures
- Shake off the excess water: Hold the filter firmly by its plastic frame and give it several gentle shakes over your sink or bathtub to dislodge trapped droplets.
- Place the unit on a towel: Lay the filter flat on a clean, dry bath towel in a warm, well-ventilated area out of direct, harsh sunlight.
- Allow a full 24 hours of drying: Leave the unit undisturbed until it is completely dry to the touch on both sides and within the inner layers.
- Reinstall with correct orientation: Slide the dry filter back into your HVAC slot, making sure the printed airflow arrows point directly toward your furnace fan.
Allowing the filter to dry completely is the single most critical step in this entire guide to prevent mold growth inside your dark ductwork. Installing a damp filter creates a breeding ground for mildew, which will quickly release unpleasant musty odors throughout your living spaces. It can also permanently damage your blower motor if moisture is sucked into the electrical components.
Once the filter is dry, double-check that the frame is seated snugly within the intake channel without any gaps around the edges. Close and latch the intake vent grille securely, then return to your thermostat to turn your heating and cooling system back on. Your system is now equipped with a fully restored, highly efficient filtration barrier.
Pro Tips, Pitfalls, and the Pros and Cons of Reusable Filters
Every home improvement decision involves balancing raw performance benefits against potential operating challenges and physical limitations. To help you determine if a washable setup matches your household’s heating and cooling requirements, we must analyze its structural strengths and practical weaknesses. This section provides an objective breakdown of what you can expect when utilizing this common maintenance routine in your everyday home life.
The Real Pros and Cons of Reusable HVAC Filters
The primary advantage of choosing a washable filter over disposable options is the incredible long-term financial savings. Instead of spending $20 to $40 every single month on temporary replacements, you make a one-time purchase that can last up to ten years with proper care. This makes it an exceptionally eco-friendly option that dramatically reduces landfill waste over time.
However, the main drawback is the ongoing physical labor required to maintain these units properly. If you lack the time or interest to perform a monthly washing and 24-hour drying cycle, a washable filter is probably not the best choice for your lifestyle. Neglecting the cleaning schedule will quickly lead to severely restricted airflow and increased wear on your HVAC system.
Furthermore, washable filters typically offer a slightly lower MERV rating compared to premium single-use pleated filters. They excel at trapping large dust and hair but are less effective at capturing microscopic allergens like fine smoke or bacteria. Weighing these financial and labor factors will help you make the best decision for your household’s needs.
Pro Tips to Maximize the Lifespan of Your Cleaned Media
To get the absolute best performance out of your washable filter, establishing a consistent and organized maintenance routine is absolutely essential. Marking your calendar on the first of every month or setting a recurring smartphone reminder ensures that you never operate a heavily clogged system. Routine cleaning prevents dust from packing tightly into the core fibers.
Another excellent pro tip is to purchase a second identical washable filter to keep as a spare in your utility closet. Having a backup unit allows you to perform an instant swap on maintenance day, meaning your HVAC system never has to remain shut down while the clean filter dries. This is especially helpful during extreme summer or winter months.
Additionally, always store your cleaning sprays in a cool, dry place away from direct sunlight to preserve their chemical potency. Keeping your tools organized and ready to use turns this essential home chore into a quick, stress-free task. Taking these small steps will prolong the life of your equipment and keep your operating costs remarkably low.
Common Mistakes to Avoid When Restoring Air Quality
The most common mistake homeowners make is reinstalling their filter while it is still slightly damp inside the core. Even if the outer frame feels dry to the touch, the dense inner layers can retain moisture for several hours. Always err on the side of caution and allow a full 24-hour drying period before putting the unit back into service.
Another frequent error is using high-pressure water sources, such as power washers or aggressive sink sprayers, to rinse the media. This excessive pressure permanently separates the woven synthetic fibers, creating large, invisible pathways where dust can slip through unfiltered. Always stick to gentle, low-pressure residential water flows.
Finally, never use hair dryers, clothes dryers, or heat guns to speed up the drying process. High, concentrated heat will quickly warp the plastic outer framework and shrink the delicate internal filtration mesh, rendering the unit completely unusable. Patience is the key to maintaining a safe, efficient, and long-lasting home filtration setup.
Concluding Thoughts on Your Home Filtration Choice
In conclusion, mastering the use of a professional air filter cleaner is a vital step toward safeguarding your home’s HVAC system and improving your family’s overall well-being. By following a structured cleaning routine and avoiding common pitfalls like high-pressure rinsing or premature installation, you can enjoy peak HVAC efficiency for years to come. Regularly washing your washable media every 30 days protects your expensive heating machinery, lowers your monthly energy bills, and reduces environmental waste. For those ready to experience cleaner air and a smoother-running system, investing in a high-quality maintenance kit online is the next step toward a healthier home.
Top picks from this guide
Thermwell Products Co., IncFrost King ACF19 Foam Coil Cleaner, 1.18 Pound (Pack of…$6 \xc2\xb7 98/100 VitalOxideVital Oxide Disinfectant, Deodorizer, Cleaner, Food-Contact Sanitizer, Virucide – (EPA…$30 \xc2\xb7 98/100
 OasisOasis Biocompatible Dish Soap Liquid & All Purpose Cleaner -…$40 \xc2\xb7 98/100
 Isopure_WaterIPWINDUSTRIESIPW Industries, Inc. - Sani System (SS24N) Liquid Cleaner for…$12 \xc2\xb7 95/100


Write Your Review
No reviews yet. Be the first to share your experience!