
Frost King ACF19 Foam Coil Cleaner, 1.18 Pound (Pack of 1), 19 Ounce

Roebic K-97 Liquid Main Line Cleaner with Bacteria Enzymes, Eliminates Organic Buildup in Sewer/Septic System and Protects from Clogs, Safe for Bathroom Toilet, 32 fl oz
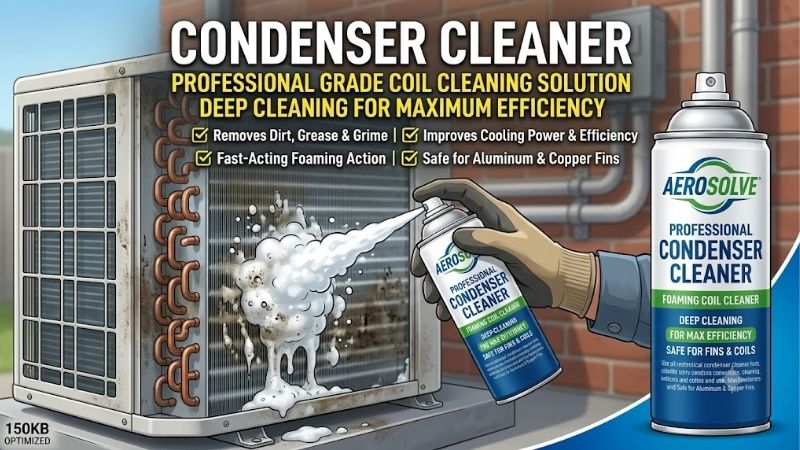
Condenser cleaner sprays are highly necessary to keep your air conditioning unit running efficiently all summer long. When dirt and grime clog your outdoor coils, your system consumes far more power and fails to cool your home properly. This comprehensive DIY guide will help you complete this essential maintenance project with absolute ease today.
Understanding AC Condenser Coils and the Role of Chemical Cleaners
Maintaining your home heating, ventilation, and air conditioning system is one of the smartest ways to avoid expensive repairs. While many homeowners remember to swap out their indoor air filters, the outdoor condensing unit is often completely forgotten. If you are preparing to tackle this task, you might find inspiration in these popular search engine titles: How to Clean Your AC Coils the Easy Way, Step-by-Step Guide: Cleaning Your Condenser Coils Safely, or How to Use a Condenser Cleaner to Restore Airflow.
The Critical Function of Condenser Coils in Your Cooling System
The outdoor condenser unit contains a network of copper tubing wound through hundreds of ultra-thin aluminum fins. Its main job is to release the heat absorbed from inside your home into the outside air. As the gaseous refrigerant travels through these copper lines, the outdoor fan pulls air across the aluminum fins to dissipate the thermal energy. This continuous heat transfer is what allows your air conditioning system to produce cold air inside your living space.
When the fins become clogged with grass clippings, dirt, pet hair, and airborne smog, they form an insulating blanket. This barrier blocks airflow and forces the compressor to run much hotter and longer to achieve the same indoor temperature. Without regular maintenance, this thermal strain will drastically reduce the operating lifespan of your expensive compressor motor.
Why Regular Maintenance Saves You Money on Energy Bills
A dirty condensing unit acts like a chokehold on your entire residential cooling system. When air cannot flow freely through the fins, the electrical energy required to run your air conditioner spikes dramatically. Studies show that cleaning a moderately dirty coil can restore up to $15%$ of your system’s overall cooling efficiency. This efficiency boost translates directly into lower monthly electricity bills, saving you substantial money over the hot summer months.
Furthermore, scheduling a quick DIY clean once a year prevents minor issues from spiraling into massive mechanical failures. If a compressor overheating occurs due to blocked airflow, a professional replacement service can easily cost you between $1200$ and $2500$. Spending under $20$ on a reliable cleaning spray is a small investment that delivers massive long-term financial security.
The Science Behind Specialized Condenser Cleaner Formulations
Household dust combined with humidity, outdoor moisture, and oil forms a tough, sticky layer of grime on the fins. Standard water pressure from a garden hose is rarely enough to dislodge this baked-on dirt from deep inside the coil grid. This is where a chemical cleaning spray becomes indispensable for removing deep contamination.
These specialized solutions are formulated with surfactant packages that actively penetrate the microscopic spaces between the aluminum fins. Upon contact with dirt, the liquid chemical undergoes a rapid foaming action that expands and pushes debris outward. This chemical lift makes it incredibly easy to rinse away years of accumulated soot without damaging the delicate aluminum.
The Ultimate Prep: Selecting Your Cleaning Supplies and Tools
Before you begin spraying down your expensive outdoor unit, you must gather the correct equipment. Working with chemical solvents and sensitive electrical machinery requires specific tools to ensure a safe, efficient, and successful project. Preparing your workstation properly beforehand will prevent accidental damage to both yourself and your cooling system.
Essential Supplies and What You Will Need on Hand
To complete this maintenance project like a seasoned HVAC technician, you need to assemble several basic items. You will need a standard nut driver set or a screwdriver to remove the metal protective grilles. A high-quality garden hose with an adjustable spray nozzle is required for rinsing the cleaning chemicals away. Additionally, having a soft-bristle brush, a set of microfiber cloths, and a reliable fin comb is highly recommended.
Most importantly, you must select a high-performance chemical foaming spray designed for outdoor aluminum coils. You should choose a professional-grade fin comb like the ones widely available on Amazon to ensure you do not flatten your delicate aluminum coils during the process. Having these specialized tools ready will turn a complex chore into a quick, satisfying thirty-minute maintenance session.
Pros and Cons of Chemical Foaming Condenser Cleaners
Using a dedicated chemical foaming spray offers incredible benefits, but it also comes with a few physical limitations. On the positive side, these heavy-duty foaming sprays are designed to self-expand, meaning they push deep dirt out from the inside of the coil without requiring you to scrub the fragile metal. They dissolve tough greasy residues, tar, and pollen that water alone cannot touch, saving you hours of frustrating manual labor. Investing less than $15 in a quality can of spray can easily save you a $150 service call fee from a local repair company.
On the negative side, these specialized chemical formulas are highly alkaline or acidic, meaning they can emit strong fumes and irritate your skin or eyes. You must handle them with extreme care and avoid spraying them during windy conditions to prevent chemical drift. Additionally, some aggressive acid-based formulas can corrode thin aluminum if they are left on the coils for too long. Choosing a non-acid, self-rinsing formula is highly recommended for beginners to minimize the risk of metal degradation.
Safety Precautions and Protecting Yourself from Harsh Chemicals
Because you are working with strong chemical agents and electrical components, personal safety must be your absolute priority. Always wear a pair of heavy-duty nitrile gloves and wrap-around safety goggles to protect your eyes from accidental chemical splattering. It is also wise to wear long sleeves and long pants to prevent any skin contact with the chemical mist.
Before you apply any cleaning solution, take a moment to look at the ground around your outdoor AC unit. Strong chemicals can quickly wither grass, flowers, and ornamental shrubs planted nearby. To protect your landscaping, thoroughly douse all surrounding plants with fresh water from your hose before and after applying the chemical spray to dilute any overspray.
The Ultimate Step-by-Step Guide to Cleaning Your AC Condenser
Now that your tools are organized and your safety gear is on, you are ready to start the cleaning process. This task is remarkably straightforward when broken down into clear, manageable steps. By following these active instructions, you can safely wash away energy-robbing grime and restore your air conditioner to peak performance.
Step 1: Shutting Off the Power and Disassembling the Outer Grille
- Locate the metal electrical disconnect box mounted on the exterior wall of your home near the outdoor unit. Open the cover, pull the main T-shaped switch or plug out completely, and set it aside to cut all high-voltage power to the fan.
- For absolute safety, go to your home’s main electrical panel inside and switch off the dedicated circuit breaker labeled for your air conditioner.
- Use your nut driver or screwdriver to remove the mounting screws securing the protective metal cage or grilles to the unit frame.
- Carefully lift the top fan assembly up and out of the housing, taking care not to pull or strain the electrical wires connected to the fan motor.
- Use a soft brush or a dry vacuum to gently remove loose leaves, twigs, and grass clippings from the bottom of the empty cabinet.
This physical disassembly is crucial because it allows you to clean the coils from the inside out, which is the most effective method. Removing loose leaves and debris beforehand prevents the wet chemical spray from turning them into a thick, muddy mess. Taking your time during this step ensures that the chemical foam can contact the metal surface directly.
Step 2: Applying the Chemical Foam and Letting It Penetrate
- Shake your can of foaming spray thoroughly for at least thirty seconds to ensure the active ingredients are fully mixed.
- Hold the can about six to ten inches away from the aluminum fins and begin spraying the solution evenly.
- Always apply the spray from the bottom of the coil and work your way up to ensure complete, uniform coverage.
- Spray the chemical foam generously on both the exterior and interior surfaces of the condenser coils.
- Let the foam sit undisturbed for ten to fifteen minutes, watching as it expands and turns from white to gray as it draws out the grime.
As the chemical reaction takes place, you will notice the expanding foam lifting years of baked-on dirt, pollen, and grease out from between the tightly packed fins. Avoid leaving the chemical solution on the metal for longer than the manufacturer recommends, as this can cause mild surface corrosion. Keeping a close eye on the clock during this phase guarantees excellent cleaning results without risking any structural damage.
Step 3: Rinsing, Straightening Fins, and Reassembling the Unit
- Set your garden hose nozzle to a gentle, wide spray pattern rather than a high-pressure jet stream.
- Position the hose on the inside of the unit and spray outward to wash the dissolved grime in the opposite direction of the airflow.
- Continue rinsing until the water running off the bottom of the unit is completely clear and free of chemical foam.
- Inspect the aluminum fins for any bent sections and use your specialized fin comb to gently straighten them back into alignment.
- Reinstall the top fan assembly, secure the outer grilles with your screws, and restore power at both the disconnect box and the main breaker.
Never use a high-pressure power washer for this step, as the intense water pressure will instantly flatten the delicate aluminum fins, permanently blocking airflow. Once the unit is fully reassembled and the power is turned back on, let your system run for fifteen minutes to verify smooth operation. You should notice a significant improvement in the temperature of the cold air coming out of your indoor registers.
Conclusion: Achieve Professional Cooling Performance at Home
Taking care of your home air conditioning system is an incredibly rewarding DIY project that pays off immediately in lower utility costs. Make sure to purchase a reliable foaming coil spray, a sturdy fin comb, and the proper protective gear before you begin your maintenance session. Head over to Amazon today to explore the best-selling maintenance kits, chemical cleaners, and accessory packs so you can upgrade your home’s cooling power with absolute peace of mind!
Top picks from this guide
Thermwell Products Co., IncFrost King ACF19 Foam Coil Cleaner, 1.18 Pound (Pack of…$6 \xc2\xb7 98/100 VitalOxideVital Oxide Disinfectant, Deodorizer, Cleaner, Food-Contact Sanitizer, Virucide – (EPA…$30 \xc2\xb7 98/100
 OasisOasis Biocompatible Dish Soap Liquid & All Purpose Cleaner -…$40 \xc2\xb7 98/100
 Isopure_WaterIPWINDUSTRIESIPW Industries, Inc. - Sani System (SS24N) Liquid Cleaner for…$12 \xc2\xb7 95/100


Write Your Review
No reviews yet. Be the first to share your experience!