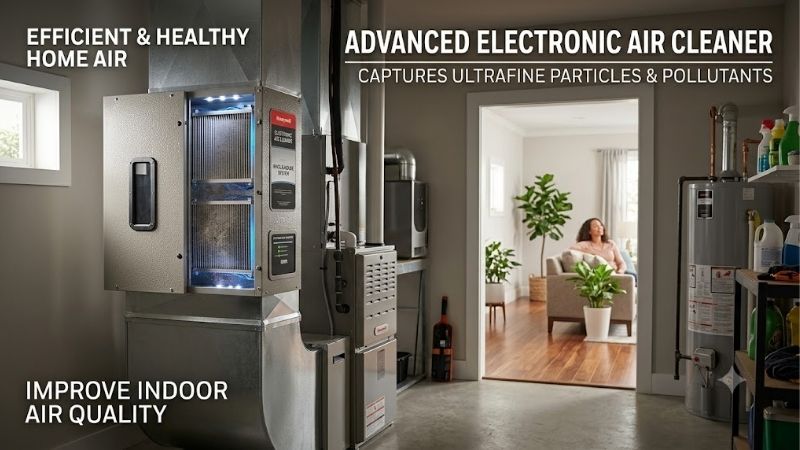
Electronic air cleaner systems require regular care to keep your indoor air fresh and allergen-free. If you want to maximize your unit’s filtration efficiency and extend its lifespan, this step-by-step guide is designed to help you achieve professional-grade results easily. Let us explore the best maintenance tips for your modern clean home setup.
Designing and Planning Your Electronic Air Cleaner Maintenance
To achieve the absolute best long-term results from your electronic air cleaner, you must start with a solid, structured plan of action. Maintaining a high-voltage household filtration system requires much more than just a quick, careless rinse under the utility tap. By carefully scheduling your maintenance tasks, inspecting your system’s current performance, and gathering the necessary safety gear, you can ensure the entire process runs smoothly, safely, and efficiently. Let us examine the foundational preparation required to keep your modern home’s air clean, fresh, and allergen-free all year long.
Essential Preparation and Tools for Your Electronic Air Cleaner
Before you begin working on your system, gathering the correct specialized tools is crucial to avoid damaging delicate internal electronic parts. A standard household DIY toolbox might not contain everything you need to handle high-voltage purification components safely. You should prepare a dedicated, dry, and clean workstation with plenty of room to lay out the heavy collector cells. Having all your maintenance items arranged in one spot beforehand prevents frustrating interruptions, keeps your living areas tidy, and ensures that you do not accidentally step on or drop any fragile parts during the cleaning session.
Your maintenance toolkit must include a pair of heavy-duty rubber gloves to protect your hands from sharp aluminum plates and any harsh cleaning solutions. You will also need a soft-bristled brush to gently sweep away loose dust, pet hair, and lint from the pre-filters. To dissolve tough, baked-on grease, smoke tar, and soot from the metallic surfaces, a specialized commercial-grade cleaning spray is highly recommended. For the absolute best cleaning performance, you can browse a selection of top-tier, fast-acting cell cleaning solutions directly on Amazon to get started today.
Understanding How Your Electronic Air Cleaner Filters Air
To maintain your system effectively, you need to understand the advanced science behind electrostatic precipitation. Unlike traditional fiberglass filters that physically block particles, these systems use electricity to attract and capture microscopic pollutants. Air entering the system first passes through a pre-filter, which traps larger debris like hair and large dust bunnies. Next, the air flows into the ionizing section, where thin high-voltage wires apply an intense positive electrical charge to the tiny remaining particles, making them highly receptive to the collector plates located further inside.
Once these tiny particles are positively charged, they travel into the collector cell assembly, which consists of closely spaced, oppositely charged aluminum plates. The positively charged dust, pollen, and smoke particles are powerfully attracted to the grounded or negatively charged plates, sticking to them like metal shavings to a magnet. Over several months, these plates accumulate a thick layer of microscopic grime, which acts as an insulator. This insulation layer reduces the electrostatic charge, drastically lowering the efficiency of your unit and allowing pollutants to slip back into your home.
Setting Up a Safe Workplace for Electronic Air Cleaner Service
Working with appliances that utilize high-voltage electrical currents demands a strict adherence to safety protocols. Before you even touch the access panel of your filtration cabinet, you must establish a clean, dry, and well-ventilated work area. Working on a damp garage floor or a cluttered basement workbench poses significant safety hazards. Ensure your chosen workspace is completely dry, well-lit, and located far away from high-traffic household areas. This setup prevents family members or pets from accidentally disturbing the delicate components while they are being serviced.
Lay down several thick, dry towels or a large non-slip rubber mat on your workbench to catch dirty water runoff and protect your surfaces. Ensure that you have easy access to a steady supply of warm water, either from a deep utility sink or an outdoor garden hose. Having your safety goggles and rubber gloves within arm’s reach ensures you can transition smoothly into the deep-cleaning phase. A well-organized, safe workspace minimizes the risk of accidental slips, drops, or chemical spills, making your entire DIY maintenance experience highly successful.
Step-by-Step Electronic Air Cleaner Cleaning and Reassembly
Once your workspace is completely ready and you understand the technology, you can proceed to the core maintenance steps. This hands-on process requires a gentle touch and strict attention to detail to ensure you do not warp the aluminum plates or snap the thin ionizing wires. By following our systematic cleaning method, you will restore your unit’s high-voltage charging capabilities and secure peak filtration efficiency. Let us walk through the exact steps of safe shutdown, deep washing, and proper drying to keep your home healthy.
Safe Power Shutdown and Inspection of Your Electronic Air Cleaner
The very first operational step is to verify that all electrical power is completely disconnected from your HVAC system. Turn your home thermostat to the ‘off’ position to stop the blower fan from circulating air through the ductwork. Next, locate the dedicated service switch on or near the furnace cabinet and flip it to the ‘off’ position. For absolute certainty, locate your home’s main electrical breaker panel and switch off the circuit breaker assigned to your heating, ventilation, and air conditioning system.
After shutting off the power, you must wait at least fifteen minutes before opening the filter cabinet door. The internal capacitors within the power supply unit hold a high-voltage charge even after the main electricity is turned off. This fifteen-minute buffer allows the residual electricity to bleed off safely, preventing any risk of static shock. Once the time has elapsed, open the door, slide out the pre-filters, and carefully remove the heavy collector cells, placing them gently onto your prepared workspace for a thorough visual inspection.
Deep Washing and Soaking Your Electronic Air Cleaner Cells
Deep washing the collector cells requires patience and a gentle cleaning approach to protect the sensitive aluminum plates. Start by taking the cells outside and rinsing them thoroughly with a garden hose using a gentle spray pattern to remove loose dust. Avoid using a high-pressure power washer, as the intense pressure will easily bend the plates and ruin the electrical spacing. After the initial rinse, place the cells into a large utility tub or a plastic container filled with warm water and your specialized detergent.
Allow the cells to soak undisturbed for twenty to thirty minutes so the soap can dissolve sticky tar, kitchen grease, and microscopic soot. If you do not have a utility tub large enough to fit these heavy metal cells, you can find durable, extra-large washing tubs designed specifically for HVAC maintenance on Amazon. Once the soaking time is complete, shake the cells gently in the water to dislodge remaining debris, and rinse them thoroughly with fresh, warm water until the runoff is completely clear.
Thorough Drying and Reinstalling Your Electronic Air Cleaner Components
Reinstalling damp collector cells into your cabinet is a critical mistake that can easily short-circuit the high-voltage power supply. You must allow the washed cells and pre-filters to dry completely in a warm, well-ventilated room for at least twenty-four hours. Set the cells on their ends, allowing gravity to pull water out from the closely spaced aluminum plates. You can place a standard household floor fan nearby to speed up the process, but never use high-heat devices like hair dryers.
Once you have verified that the cells are 100% dry, look closely between the plates to ensure no lint or water droplets remain. Slide the pre-filters back into their designated slots, followed by the clean collector cells, paying close attention to the directional airflow arrows. The arrows must point in the direction of the moving air stream to ensure proper electrostatic function. Securely latch the access door, restore power to the system, and turn your thermostat back to your preferred temperature setting.
Troubleshooting and Performance Optimization for Your Electronic Air Cleaner
With your cleaning completed, your home should soon be filled with crisp, purified air that is free of common allergens. However, keeping your system operating perfectly over the years requires ongoing troubleshooting skills and an understanding of its practical limits. In this final section, we will help you resolve common noises, evaluate the essential pros and cons of this technology, and choose high-quality replacement parts. Mastering these aspects ensures your residential filtration system remains a valuable long-term asset.
Troubleshooting Snapping Noises in Your Electronic Air Cleaner
It is common to hear an occasional popping or snapping sound from your cabinet, which indicates that a large particle is being incinerated. However, continuous, rapid snapping or a loud buzzing sound usually points to an underlying issue that requires immediate attention. The most frequent cause of continuous snapping is residual moisture remaining on the collector plates after a cleaning session. If this occurs, shut the system down immediately, remove the cells, and let them dry for an additional twelve hours before restoring power.
Another common cause of continuous snapping is a bent aluminum plate touching an adjacent plate, creating a direct short circuit. Inspect the cells carefully and, if you locate a bent plate, gently straighten it using a pair of needle-nose pliers. Broken ionizing wires can also dangle and cause electrical arcing against the cabinet walls. If you need replacement ionizing wires or a set of professional insulated pliers to perform these minor adjustments safely, you can search for authorized replacement parts and HVAC hand tools directly on Amazon.
Pros and Cons of an Electronic Air Cleaner System
Understanding the advantages and disadvantages of electrostatic filtration helps you make informed decisions about your home’s long-term air quality strategy. The primary advantage of an electronic air cleaner is its exceptional long-term cost efficiency compared to traditional media filters. Since the metal collector cells are completely reusable, you will save hundreds of dollars over the years by avoiding expensive disposable replacements. Additionally, these units are incredibly efficient at capturing tiny particles down to 0.1 microns, which includes dangerous smoke, bacteria, and viruses.
On the downside, these systems demand regular, hands-on maintenance every few months to keep them operating at peak efficiency. If you have a busy lifestyle, the physical effort required to shut down, wash, and dry the cells can become a tedious chore. Furthermore, the electrostatic process naturally produces tiny traces of ozone, which can sometimes irritate individuals with pre-existing severe respiratory conditions. Weighing these practical trade-offs allows you to determine if electrostatic filtration remains the best choice for your household needs.
Finding the Right Replacement Parts for Your Electronic Air Cleaner
Over several years of continuous operation, certain parts of your electrostatic filter will naturally degrade due to high-voltage stress. The plastic insulators that support the collector cells can become brittle and crack, causing electrical leakage and reduced performance. The fine tungsten ionizing wires can also snap over time due to thermal expansion and normal wear. Replacing these worn-out components promptly is essential to protect your HVAC system and ensure that your indoor air quality does not suffer.
To maintain the safety and integrity of your system, always choose genuine, original equipment manufacturer replacement parts rather than cheap generic alternatives. High-quality replacement pre-filters, new ionizing wires, and replacement cell insulators are readily available for all major brands online. If you want to purchase these parts conveniently with fast shipping, you can explore the extensive inventory of genuine HVAC components available on Amazon. Keeping a few spare ionizing wires on hand ensures you can resolve any sudden failures instantly.
Conclusion
In conclusion, keeping your electronic air cleaner in top shape is an easy and cost-effective way to guarantee fresh, healthy indoor air for your family. By dedicating a few hours every couple of months to perform this detailed guide, you will maximize the system’s lifespan and preserve your high-voltage investment. Having the correct cleaning solutions, brushes, and spare parts is essential to make this maintenance routine simple and hassle-free. To prepare for your next scheduled cleaning, head over to Amazon to find high-quality HVAC maintenance supplies, and take control of your home’s air purity today!
Top-Rated Picks


Filtrete 16x25x1 Air Filter MERV 5, 6-Pack AC Furnace HVAC, MPR 300 Basic Dust Defense, Pleated Electrostatic, Removes Lint


| Product | Brand | Rating | Reviews | Price |
|---|---|---|---|---|
| Filtrete 14x30x1 Air Filter MERV 5, 6-Pack AC Furnace… | — | ★ 4.7 | 160.2k | $27.96 |
| Filtrete 20x20x1 Air Filter MERV 5, 6-Pack AC Furnace… | — | ★ 4.7 | 160.1k | $39.99 |
| Filtrete 16x25x1 Air Filter MERV 5, 6-Pack AC Furnace… | — | ★ 4.7 | 160.1k | $27.96 |
| Filtrete 16x20x1 Air Filter MERV 5, 6-Pack AC Furnace… | — | ★ 4.7 | 159.6k | $33.84 |
| Filterbuy 16x30x1 Air Filter MERV 8 Essential Dust & … | Filterbuy | ★ 4.7 | 158k | $49.96 |


Write Your Review
No reviews yet. Be the first to share your experience!