
A clogged or damaged dryer vent can make clothes take longer to dry, raise energy use, and overheat the appliance. Lint buildup is also combustible, so cleaning the vent is routine maintenance—not just a cosmetic chore. When cleaning from outside, the biggest risks are pushing lint deeper into the duct, damaging the exterior vent flap, or working near a running dryer. The method below focuses on the outdoor termination, where lint, dirt, insects, and bird nests commonly collect.
Before starting, check your dryer’s manual and local building requirements. Most household dryers use a 4-inch vent connection, but the exterior cover and duct configuration can vary. If the vent exits high on a wall or roof, use professional equipment rather than climbing an unstable ladder.
As an Amazon Associate we earn from qualifying purchases at no extra cost to you.

Quick answer: Our top pick in 2026 is the Work gloves and safety glasses — our #1 rated choice. See the full ranked comparison, alternatives and buying advice below.
What You Need
| Item | Why | Optional? |
|---|---|---|
| Work gloves and safety glasses | Protect your hands from sharp metal, insects, and compacted lint. | No |
| Screwdriver or nut driver | Removes fasteners from many exterior vent covers. | Usually |
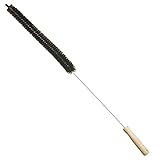
| Dryer vent brush, 4-inch flexible brush, or vent-cleaning kit | Loosens lint inside the termination and the first section of duct. | No |
| Vacuum with a narrow hose attachment | Collects loose lint without blowing it around the wall or yard. | No, but strongly recommended |
| Soft nylon brush, microfiber cloth, and mild dish soap | Cleans the cover without bending louvers or scratching the finish. | Soap and cloth are optional |
| Replacement exterior cover | Useful if the existing cover is cracked, stuck, missing, or badly rusted. | Yes |
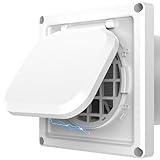
| 4-inch exterior vent cover | Common replacement size. Options include a magnetic-door cover listed around $12.99 or a louvered cover with screen around $9.99; verify dimensions and local code before buying. | Yes |
Avoid using a leaf blower, compressed air, or a shop vacuum in blower mode at the outdoor opening. These can force lint farther into the duct or spread it around the siding. Also, do not add a fine mesh screen unless it is specifically permitted for your dryer system. Screens can trap lint and restrict airflow; many dryer terminations are designed to use a flap or louver without a screen.
Step-by-Step
1. Turn off and cool the dryer (5 minutes)
Stop the dryer and unplug it. If the plug is difficult to reach, turn off the dryer’s circuit breaker. Wait until the appliance and the vent area are cool. Never clean the vent while the dryer is operating.
Pull the dryer forward only if you also plan to inspect the indoor connection. Keep the appliance level and avoid sharply bending the flexible transition duct. A crushed or kinked duct can restrict airflow even after the exterior opening is clean.
2. Locate and inspect the outside termination (5 minutes)
Find the vent opening on the exterior wall. Look for a flap or louvers that open when the dryer runs and close when it stops. Check for lint mats, leaves, mud, insect nests, bird nesting material, cracks, loose screws, and gaps around the frame.
Measure the vent opening if you may need a replacement. A nominal 4-inch vent may have an outside cover measuring roughly 6 by 6 inches, but dimensions differ by product. Measure the wall opening and the duct diameter rather than relying only on the advertised package size.
3. Remove the cover carefully (5 to 10 minutes)
If the cover is screwed to the wall, support it with one hand while removing the fasteners. Set the screws aside. Some covers have a hinged or magnetic door that can be opened without removal; use that access point if it provides a clear path for the brush and vacuum.
Do not pry aggressively against vinyl siding, stucco, brick, or painted trim. If the cover is sealed with caulk, cut the bead carefully with a utility knife. Stop if the wall material begins to crack or the cover appears connected to a rigid duct that could be pulled loose.
4. Remove visible lint and debris (5 minutes)
Put on gloves and pull out loose lint by hand. Place it in a bag rather than allowing it to fall into landscaping. Use a soft brush to remove dirt from the flap, louvers, and frame. A vacuum with a narrow attachment can collect debris at the opening.
Keep the flap or louvers intact. They should move freely but should not be forced beyond their normal range. If a bird or insect nest is occupied, stop and contact a wildlife professional before disturbing it.
5. Brush the accessible duct from outside (10 to 20 minutes)
Insert a dryer vent brush into the opening, keeping it aligned with the duct. Push gently, rotate as directed by the kit, and pull it back periodically to remove loosened lint. Work in short sections instead of forcing the brush deep into the wall.
For a flexible rod kit, add sections only as needed. A typical exterior-wall run may be short, but the vent could travel several feet or change direction inside the wall. Do not force a brush around a sharp bend, and do not use a drill at high speed unless the cleaning kit specifically allows it. Excessive torque can detach the duct or damage the brush.
Vacuum the opening as you work. If the brush meets firm resistance, withdraw it rather than pushing harder. The obstruction could be a crushed duct, a screw, a damper, or nesting material.
6. Clean and reinstall—or replace—the cover (10 to 20 minutes)
Wash a removable cover with warm water and a small amount of dish soap, then dry it completely. Do not reinstall a cracked, warped, rusted, or permanently stuck cover. A replacement should have a compatible 4-inch duct connection, weather-resistant material, and a flap or louvers that open easily.
Position the cover squarely and reinstall the fasteners without overtightening. Seal gaps around the frame with an exterior-rated sealant compatible with the wall surface. Do not seal over the moving flap. If the design includes a screen, confirm that it is approved for dryer use and inspect it frequently for lint buildup.
7. Test airflow and check for leaks (5 minutes)
Restore power and run the dryer on an air-fluff or timed setting for several minutes. From outside, confirm that the flap opens and that air flows steadily. Hold a lightweight tissue near—not inside—the termination; it should move outward while the dryer runs.
Turn the dryer off and confirm that the flap closes. Listen for rattling, scraping, or unusual vibration. If airflow is weak, the cover does not open, or lint immediately returns in large amounts, stop using the dryer until the duct is inspected more thoroughly.
Mistakes to Avoid
- Cleaning only the cover: A clear flap does not prove that the duct behind it is clear.
- Pushing debris inward: Always withdraw the brush and vacuum loosened lint rather than forcing it farther into the wall.
- Using a restrictive screen: Fine mesh can collect lint quickly and reduce airflow.
- Leaving the flap stuck open: This invites rain, cold air, pests, and nesting material.
- Working on a hot or running dryer: Disconnect power before handling the vent.
- Ignoring the indoor transition duct: The hose behind the dryer can be crushed, torn, or packed with lint.
- Applying too much caulk: Seal the frame, not the moving vent door.
- Using a ladder casually: Do not clean a high termination from an unstable ladder or roof.
How Often
Inspect the outside cover at least every few months and whenever drying times increase. Clean the accessible vent termination at least once a year. Homes with large families, frequent laundry, pets, long vent runs, or a vent that exits through the roof may need more frequent service.
Clean the dryer’s interior lint screen after every load. A clean screen reduces—but does not eliminate—the amount of lint entering the duct. If clothes that once dried in 45 minutes now need 75 minutes, schedule an inspection even if the outside cover looks clean.
When to Call a Pro or Replace
Call a professional if the brush cannot pass through, the duct runs a long distance, the vent exits on the roof, or you suspect a disconnected, crushed, or improperly routed duct. Professional cleaning may be appropriate when lint is packed deep inside or when the dryer overheats, shuts off, or smells hot.
Replace the exterior cover if its louvers are broken, the hinge is seized, the frame is badly corroded, or animals can enter around it. Replace damaged flexible transition duct rather than patching a tear with ordinary duct tape. A qualified technician should evaluate rigid duct sections that are loose, crushed, or made with unsuitable materials.
FAQ
Can I clean a dryer vent entirely from outside?
You can often remove substantial lint from a short, straight run through the exterior opening. However, outside cleaning may not reach the entire duct or the connection behind the dryer. For a long, angled, roof-exiting, or obstructed run, have the complete system inspected.
Should a dryer vent have a screen?
Usually, a dryer termination uses a flap or louver rather than a fine screen because screens can trap lint. Some products advertise screens, but compatibility and local requirements vary. Follow the dryer manufacturer’s instructions and local code, and clean any approved screen frequently.
Why is the outside dryer vent not blowing much air?
Possible causes include a clogged duct, stuck flap, crushed transition hose, disconnected duct, overloaded dryer, or restricted cover. Check the cover first, then stop using the dryer if airflow remains weak or the appliance feels unusually hot.
How long does outside dryer vent cleaning take?
A basic inspection and cleaning usually takes about 30 to 60 minutes, including cover removal, brushing, vacuuming, and testing. Difficult access, a damaged cover, or a long duct can add time and may require professional equipment.
Ready to decide? Our #1 pick for 2026 is the Work gloves and safety glasses.
Live price & availability on Amazon.





Write Your Review
No reviews yet. Be the first to share your experience!