
A clogged dryer vent can make clothes take longer to dry, leave the drum unusually hot, and force the appliance to run longer than necessary. In serious cases, accumulated lint can restrict airflow enough to create a fire hazard. Cleaning the vent with a brush is effective only when you loosen the lint carefully and remove it instead of pushing it deeper into the duct.
Before starting, read your dryer’s manual and work with the appliance unplugged. If you have a gas dryer, close the gas shutoff valve if you can do so safely, and never kink, disconnect, or stress the gas line. This guide explains how to unclog a dryer vent with brush for a typical residential dryer, including the wall duct and the exterior vent hood.
As an Amazon Associate we earn from qualifying purchases at no extra cost to you.

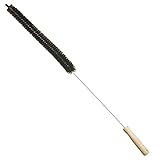
Quick answer: Our top pick in 2026 is the Dryer vent brush kit with flexible rods — our #1 rated choice. See the full ranked comparison, alternatives and buying advice below.
What You Need
| Item | Why | Optional? |
|---|---|---|
| Dryer vent brush kit with flexible rods | Reaches through the duct and breaks up lint. A 20- to 30-foot kit is useful for long or hard-to-reach runs. | No |
| Vacuum with hose and narrow crevice tool | Removes loosened lint from the dryer connection, wall opening, and floor. | No |
| Screwdriver or nut driver | Removes the clamp or fasteners holding the vent hose to the dryer. | Usually |
| Work gloves and a dust mask | Protects hands from sharp metal edges and reduces exposure to lint and dust. | Recommended |
| Flashlight | Helps you inspect the hose, wall opening, and exterior vent hood. | Recommended |
| Dryer vent cleaning attachment | Connects some brush systems to a vacuum for better lint collection. | Optional |
| Replacement clamp or approved vent material | Useful if the existing connection is loose, damaged, or leaking. | Only if needed |
For a basic brush, expect to spend about $6 to $10. A longer flexible kit, such as the Holikme Dryer Vent Cleaner Kit with 30-foot rods, typically costs about $20. Choose a brush sized for dryer ducts, usually around 4 inches in diameter. Avoid a head so large that it binds inside the duct.
Step-by-Step
1. Turn Off and Cool the Dryer (5 minutes)
Stop the dryer and wait until it is completely cool. Unplug the power cord from the outlet. If the plug is difficult to reach, switch off the dryer’s circuit breaker instead. For a gas model, turn the gas supply valve clockwise if it is accessible without moving or straining the appliance.
Pull the dryer forward slowly. Leave enough room to work without sharply bending the exhaust hose, gas line, or power cord. Do not drag a gas dryer across the floor or pull it by the hose.
2. Disconnect and Inspect the Vent Hose (5 to 10 minutes)
Loosen the clamp where the vent hose attaches to the back of the dryer. Depending on the design, you may also need to disconnect the hose from the wall connection. Place a towel underneath to catch loose lint.
Look for crushed sections, holes, heavy lint buildup, or a hose that is excessively long. Replace damaged plastic or thin foil accordion tubing. For most installations, a short, smooth, UL-listed transition duct made for dryers is safer and easier to clean than a sharply folded hose. Do not use screws that project into the duct, because lint can catch on them.
3. Clean the Exterior Vent Hood First (5 minutes)
Go outside and find the dryer exhaust hood. Remove visible lint from the flap and opening. Make sure the flap moves freely and is not blocked by a screen, nest, leaves, snow, or another obstruction.
Do not add a fine mesh screen over the dryer vent. Screens can collect lint quickly and restrict airflow. If the hood is broken or stuck, replace it before using the dryer.
4. Vacuum the Dryer Connection and Wall Opening (5 to 10 minutes)
Use the vacuum hose to remove lint from the dryer’s exhaust outlet and the exposed wall duct. Reach only as far as the vacuum tool can go safely. A narrow crevice attachment can collect loose lint without scraping the duct.
Do not place your hand deep into a metal opening without gloves. Cut sheet-metal edges can be sharp. If the wall connection is visibly crushed or packed solid, stop and consider professional cleaning rather than forcing the brush through it.
5. Assemble the Brush and Insert It Carefully (10 to 15 minutes)
Attach the first rod to the brush head and insert the brush into the wall-side duct or the disconnected hose. Push gently while turning the rod clockwise. The rotation helps the bristles loosen lint and helps keep threaded sections tight.
Add rods one at a time as the brush advances. Keep the brush aligned with the duct; do not bend it sharply or force it around a blockage. If you feel strong resistance, pull back several inches, rotate, and try again. A brush that is forced can separate inside the duct or damage a joint.
For a short run, a compact flexible lint brush may be enough. For a long run, a 30-foot kit offers more reach, but extra length is not automatically better. Use only enough rod to reach the end of the duct and maintain control.
6. Work the Brush Back and Forth (5 to 10 minutes)
Once the brush is several feet into the duct, move it back and forth in short strokes while rotating clockwise. Withdraw it slowly, continuing to turn the rods. Expect lint to come out in clumps.
Vacuum the opening frequently rather than allowing loosened lint to fall back into the duct. If the duct exits through the roof, the brush may not reach the entire route from indoors. Do not guess at roof work; a professional can clean and inspect that section safely.
7. Clean the Hose and Reassemble the Connection (10 minutes)
Vacuum both ends of the vent hose. If the hose is smooth and undamaged, you can wipe or brush it out carefully. Replace it if it is crushed, torn, excessively flexible, or longer than necessary.
Reconnect the hose without inserting it too far into the wall or dryer outlet. Tighten the clamp firmly, but do not deform the hose. The duct should have a gradual path with as few bends as possible. Push the dryer back into place while watching that the hose does not collapse.
8. Test Airflow and Drying Performance (5 minutes)
Plug the dryer back in and reopen the gas valve if applicable. Run the dryer on an air-fluff or low-heat setting for several minutes. Go outside and confirm that the exterior flap opens and that a steady stream of warm air exits.
Stop immediately if you smell gas, hear unusual scraping, see smoke, or notice that the flap does not open. A weak airflow after cleaning can indicate a blocked wall or roof duct, an undersized installation, a failed exterior hood, or an appliance problem.
Mistakes to Avoid
- Cleaning with the dryer plugged in: Always disconnect power before removing the hose.
- Pushing lint farther into the wall: Brush from the dryer side and vacuum as you work. Do not blindly drive a brush through a blockage.
- Using a drill at high speed: A drill-compatible system can spin a brush, but use low speed and follow the kit instructions. Excessive speed can damage joints or trap the brush.
- Leaving a crushed hose behind the dryer: A restricted hose can recreate the problem immediately.
- Using screws inside the duct: Their exposed tips collect lint.
- Cleaning only the lint screen: The screen does not remove lint that has entered the exhaust duct.
- Spraying water or chemicals into the duct: Moisture can create clumps and may damage the dryer.
How Often
Clean the lint screen after every load and inspect the exterior flap regularly. For many households, brush-cleaning the vent once a year is a reasonable starting point. Clean it more often—about every six months—if you run several loads per day, have pets, dry heavy fabrics, or notice longer drying times.
Clean sooner if clothes remain damp after a normal cycle, the dryer cabinet feels unusually hot, the laundry room becomes humid, or the exterior airflow weakens. A clean screen does not guarantee a clear vent.
When to Call a Pro or Replace
Call a professional if the duct runs through a wall or ceiling that you cannot access, exits through the roof, is packed solid, or requires roof or crawl-space work. Professional cleaning is also appropriate if the brush becomes stuck, the duct separates inside a wall, or airflow remains weak after cleaning.
Replace the vent hose when it is torn, crushed, kinked, or made from an unsuitable plastic material. Replace the exterior hood if its flap is broken, stuck, or missing. If the dryer overheats, repeatedly shuts off, smells electrical, or has a damaged power cord, stop using it and arrange appliance service. Vent cleaning cannot correct a faulty heating element, thermostat, motor, or control system.
FAQ
Can I unclog a dryer vent with a regular household brush?
A short, flexible lint brush can clean the first few feet, but it may not reach a long wall duct. Use a purpose-built dryer vent brush with connected rods and a head sized for a roughly 4-inch duct. Never use a rigid broom handle or an improvised metal tool.
Should I clean the vent from inside or outside?
Start inside by disconnecting the dryer and cleaning the appliance connection and wall opening. Clean the exterior hood separately. If the duct is long, cleaning from both accessible ends may remove more lint, but do not force the brush if the route turns sharply or exits through a roof.
How do I know the vent is still clogged?
Warning signs include drying cycles that take longer than usual, a hot dryer cabinet, damp room air, a stuck exterior flap, or weak airflow outside. After cleaning, the flap should open during operation and air should move steadily through the hood.
Is a 30-foot dryer vent brush kit always necessary?
No. A compact brush costing about $6 may be sufficient for a short, straight vent. A longer kit costing about $20 is more useful for extended runs, but length should match the duct. A professional is safer when the duct is inaccessible, unusually long, routed through a roof, or damaged.
Ready to decide? Our #1 pick for 2026 is the Dryer vent brush kit with flexible rods.
Live price & availability on Amazon.





Write Your Review
No reviews yet. Be the first to share your experience!