
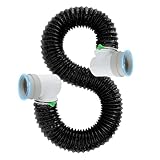
- Top Pick: Dryer Vent Hose for Tight Space, 90 Degree Dryer Vent Elbow Connector Kit with 6-Layer Flexible Aluminum Duct, Space-Saving 4 Inch Dryer Hose Kit with Elastic Rubber Seal
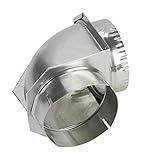
- Best Value: Whirlpool 4396006RW Genuine OEM Dryer Vent Elbow Connector, 90-Degree Close-Turn, 4-Inch Aluminum Space-Saver Accessory
- Premium Choice: 4Inch Dryer Vent Hose 10FT, Rubber Interface, Dryer Vent Connector Kit
The Short Answer
For nearly every full-size residential clothes dryer, the correct dryer vent hose size is 4 inches in diameter, which equals 10.16 cm. The hose attaches to the round exhaust outlet on the back of the dryer and runs to the wall vent connection. Most 4-inch dryer ducts are designed to fit a dryer outlet and wall collar measuring approximately 4 inches across.
Measure the diameter, not the hose length. A 4-inch hose should slide over the dryer’s 4-inch exhaust collar and the wall connection, then be secured with clamps. Do not use a 3-inch or 5-inch duct simply because it seems to fit. An undersized hose can restrict airflow, while an oversized hose may not seal correctly.
As an Amazon Associate we earn from qualifying purchases at no extra cost to you.


For a typical installation, choose a smooth, UL-listed or manufacturer-approved metal transition duct. Flexible aluminum is useful where the dryer must move or the connection needs a slight bend. Avoid plastic, vinyl, foil-only accordion ducts, and improvised materials. They can sag, collect lint, or become unsafe when exposed to dryer heat.
Standard Sizes
The table below covers the measurements most useful when selecting a dryer vent hose. “Nominal” size is the stated size used by manufacturers; the actual outside diameter of a collar or duct can vary slightly by brand and construction.
| Part or measurement | Typical size in inches | Metric equivalent | What to know |
|---|---|---|---|
| Standard dryer vent hose diameter | 4 in | 10.16 cm | The standard size for most residential electric and gas dryers |
| Common dryer exhaust collar | About 4 in outside diameter | About 10.16 cm | Measure the actual collar if the connection looks unusual |
| Common wall vent collar | About 4 in outside diameter | About 10.16 cm | Usually accepts the same 4-inch duct |
| Typical flexible hose lengths | 4, 5, 6, 8, or 10 ft | 1.22, 1.52, 1.83, 2.44, or 3.05 m | Use the shortest practical length |
| Typical minimum bend diameter | About 8 in or more | About 20.3 cm or more | Depends on the duct material and manufacturer |
| Typical dryer depth | 27–32 in | 68.6–81.3 cm | Check your model before planning the final clearance |
A 4-inch duct has a nominal cross-section of roughly 12.6 square inches. That opening is part of the airflow system, so reducing it with an adapter can increase resistance and encourage lint buildup. If your dryer manual specifies a different vent arrangement, follow the manual rather than relying on a universal fitting.
How to Measure Your Space
- Measure the dryer outlet. Unplug the dryer, pull it forward, and measure across the exhaust collar. Measure from edge to edge with a tape measure. Most collars are close to 4 inches across.
- Measure the wall connection. Check the round metal collar behind the dryer or the opening in the wall box. It should also be approximately 4 inches. If the collar is damaged, bent, or missing, replace or repair it before attaching a hose.
- Measure the route, not a straight line. Run a tape measure from the dryer outlet to the wall connection, following the path the hose must take. Add enough length for gentle curves, but do not buy several extra feet that will bunch up behind the machine.
- Check rear clearance. A standard 4-inch hose can need several inches behind the dryer, especially if it connects directly to a rear-facing outlet. Measure from the wall to the front of the dryer with the hose attached. A 90-degree elbow or recessed wall box may save approximately 3–6 inches of depth, depending on the parts used.
- Look for sharp bends. Keep the duct as straight as possible. If the dryer sits close to the wall, a close-turn elbow or space-saving connector can create a smoother route than sharply bending a flexible hose.
- Confirm the connection method. Most hoses slide over the dryer and wall collars and are secured with worm-drive clamps. Do not use screws that protrude into the duct; they can catch lint.
- Check the manufacturer’s limits. Dryer manuals commonly specify a maximum vent length and deductions for elbows. The permitted length varies by model, so use the manual’s chart when available.
By Room or Use Case
Laundry Room With a Standard Rear Outlet
A 4-inch flexible aluminum transition duct is usually the simplest choice. Select a length that reaches the wall without compression or a large loop. For a gap of about 12–24 inches, a 4- or 5-foot hose may be easier to position than a 10-foot hose. Leave the dryer level and accessible enough to inspect the connection.
Closet or Tight Laundry Nook
Depth matters more than hose length in a closet. A 90-degree, close-turn elbow can redirect the hose toward the wall and reduce the space required behind the dryer. Products such as a tight-space 90-degree dryer elbow kit or the Whirlpool 4396006RW Genuine OEM 4-inch close-turn connector are examples of this type of accessory. Similar kits may cost roughly $12–$30, depending on materials and included seals.
Check ventilation around the appliance as well as duct clearance. A gas dryer must have the combustion-air clearance specified by its manual, and a closet installation may require a louvered door or other ventilation provisions.
Long Run to an Exterior Wall
For a long route, use rigid or semi-rigid metal duct where possible and limit the number of elbows. Flexible duct is convenient at the final connection but can create more resistance when stretched over a long distance. A 10-foot, 4-inch hose may cost approximately $20–$40, but the correct maximum length depends on the dryer and the number of bends.
Stacked Washer and Dryer
Measure the height and rear offset before ordering. A stacked unit may require a shorter, more controlled connection because the appliances sit close to a wall or inside a cabinet. Confirm that the hose does not support the weight of the dryer, rub against a sharp edge, or block an access panel.
Garage or Utility-Room Installation
Use the same 4-inch diameter unless the manufacturer states otherwise. The duct must terminate outdoors, not inside a garage, attic, crawlspace, wall cavity, or bucket. A 4-inch rubber-interface connector kit can help create a snug seal at the appliance, but rubber or flexible materials should be used only when rated for dryer vent service.
Cleaning and Maintenance
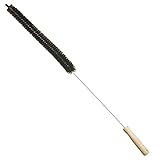
Clean the lint screen after every load and inspect the hose at least annually. A universal vacuum hose attachment and brush kit may cost about $10–$20 and can help clean accessible sections, but it should not replace professional cleaning of a long or concealed duct run. Disconnect power before moving the dryer or cleaning its vent connection.
Common Sizing Mistakes
- Buying by length alone: A 10-foot hose is not automatically better. Excess duct can sag, kink, and collect lint.
- Choosing the wrong diameter: Most dryers use 4 inches, not 3 or 5 inches. Verify both collars before purchasing an adapter.
- Measuring the opening incorrectly: Measure the round collar’s diameter, not its circumference. If you measure around it, a 4-inch diameter collar has a circumference of about 12.6 inches.
- Compressing the hose: A flexible duct should not be crushed behind the dryer to make the appliance fit.
- Ignoring elbows: Every bend affects airflow and may reduce the maximum permitted duct length.
- Using duct tape as the only support: Secure connections with appropriate clamps. Foil tape may be suitable for certain metal duct joints, but follow the product and dryer instructions.
- Forgetting the wall side: A hose that fits the dryer may not fit a damaged, recessed, or nonstandard wall collar.
FAQ
Is a 4-inch dryer vent hose universal?
It is the standard size for most residential dryers, but “universal” does not mean every installation is identical. Check the dryer collar, wall collar, connection depth, maximum length, and required duct material. Compact or specialty appliances may have different instructions.
Can I use a 3-inch hose on a dryer?
Usually not. A 3-inch hose reduces the vent opening and may restrict airflow. Use the diameter specified by the dryer manufacturer; for most full-size models, that is 4 inches. Do not force a smaller hose over a larger outlet.
How much space does a dryer vent hose need behind the dryer?
There is no single clearance for every model. A straight rear connection may need several inches, while a close-turn elbow or recessed wall box can reduce the required depth. Measure with the hose attached and keep the duct free of crushing or sharp bends.
Should a dryer vent hose be insulated?
Insulation is not a substitute for the correct duct or proper termination. In a heated indoor laundry room, standard approved metal duct is generally used. If a duct runs through a cold, unconditioned area, ask a qualified professional about condensation control and local code requirements. Always keep the vent sealed, supported, and routed to the outdoors.
Ready to decide? Our #1 pick for 2026 is the Standard dryer vent hose diameter.
Live price & availability on Amazon.




Write Your Review
No reviews yet. Be the first to share your experience!