
Nylon duct-cleaning rods are flexible, lightweight, and useful for pushing a brush through dryer vents, fireplace flues, bathroom exhaust ducts, and other narrow passages. But they can become unreliable when they are stored wet, bent sharply, overloaded, or spun too quickly in a drill. A damaged rod may kink inside a duct, shed debris, separate at the connection, or become difficult to retrieve.
Proper maintenance takes only a few minutes after each use. The process is mostly about removing grit, drying the rods completely, checking the threads and connectors, and storing the set without tight bends. This guide explains how to keep nylon rods ready for safe, effective cleaning throughout 2026 and beyond.
As an Amazon Associate we earn from qualifying purchases at no extra cost to you.


Quick answer: Our top pick in 2026 is the Clean, soft cloths — our #1 rated choice. See the full ranked comparison, alternatives and buying advice below.
What You Need
| Item | Why | Optional? |
|---|---|---|
| Clean, soft cloths | Wipe off lint, soot, grease, and loose grit without roughening the nylon. | No |
| Warm water and mild dish soap | Removes oily residue and fine dust from the rods and brush head. | No |
| Soft nylon or toothbrush-style brush | Clears debris from threads, couplers, and grooves. | Optional |
| Clean bucket or utility sink | Provides room to wash longer sections without dragging them across a dirty floor. | Optional |
| Protective gloves and eye protection | Helps shield your skin and eyes from lint, soot, moldy dust, and sharp duct debris. | No |
| Dry storage bag or ventilated container | Keeps the set together while allowing remaining moisture to escape. | No |
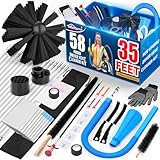
| Nylon duct brush kit | Replacement or additional rods may be useful for long runs or different duct diameters. Common consumer kits cost about $15 to $35; examples such as Holikme and AOGYikang kits are listed at $19.99. | Optional |
Step-by-Step
1. Disconnect equipment and lay out the rods (5 minutes)
Before handling the rods, turn off and unplug the appliance or fan connected to the duct. For a gas dryer, close the gas supply only if you are qualified to do so and can safely restore the connection; otherwise, arrange professional service. Do not work on a hot fireplace or flue.
Spread the rods on a clean surface in the order they were used. Separate brush heads, adapters, couplers, and end caps. Keeping the pieces organized makes it easier to identify a missing connector or a section that has started to deform.
2. Remove loose debris while the rods are dry (3 to 5 minutes)
Shake or gently tap each rod over a trash bag or protected outdoor surface. Use a dry cloth to remove lint and dust. A vacuum with a brush attachment can help collect loose particles, but keep the vacuum nozzle from scraping hard against the nylon.
Do not twist a rod aggressively to remove stuck material. If lint is wrapped around a connector, pull it away gradually or use a soft brush. Metal picks, utility knives, and wire brushes can score the surface and create weak points.
3. Wash the nylon sections and brush (5 to 10 minutes)
Mix a small amount of mild dish soap into warm water. Wipe each rod from end to end, paying particular attention to the first few inches near each threaded connection. This area often collects compacted lint, soot, or oily residue.
For heavier buildup, soak the nylon pieces for about 5 minutes, then scrub them gently with a soft brush. Rinse with clean water. Avoid bleach, acetone, paint thinner, gasoline, and strong degreasers. These chemicals may discolor, soften, or embrittle plastic components, and residue can later transfer into a duct.
Keep metal adapters and drill connectors out of prolonged water exposure unless their manufacturer permits it. Wipe them separately and dry them promptly to reduce corrosion.
4. Dry every component completely (several hours)
Place the rods straight or in a loose, broad loop on a clean towel. Leave space between pieces so air can reach all sides. Allow at least 2 to 4 hours of drying time after a light wipe-down; washed rods may need overnight drying in a cool, ventilated room.
Do not use a heat gun, clothes dryer, radiator, or high-wattage hair dryer. Direct heat can soften nylon or permanently bend a rod. A normal room fan is acceptable if it is positioned safely away from water. Never seal damp rods in a plastic bag, where trapped moisture can encourage odor, mildew, or corrosion on metal fittings.
5. Inspect for damage before reassembly (5 minutes)
Run your fingers along each rod and look for flattened areas, deep scratches, cracks, whitening, melted spots, or permanent bends. Slight flexibility is normal; a section that no longer returns to its original shape is not dependable for pushing or rotating a brush.
Examine both ends for stripped threads, loose collars, cross-threading, and hairline splits. Check that the brush bristles remain firmly attached and are not so worn that they fail to contact the duct walls. If a coupler spins freely without tightening, set that part aside for replacement.
6. Reassemble carefully and test the fit (3 minutes)
Thread the parts together by hand. Start each connection slowly and turn it backward slightly until the threads align, then tighten by hand. Do not use pliers unless the manufacturer specifically provides a gripping point. Over-tightening can deform plastic threads and make later disassembly difficult.
For drill-assisted cleaning, use the supplied adapter and the lowest practical setting. A slow range of roughly 250 to 400 revolutions per minute is a cautious starting point, but the kit’s instructions take priority. Do not use hammer mode, impact mode, or a high-power setting simply because the drill can produce it. Keep the rod moving and avoid forcing a brush around a sharp elbow.
7. Store the set without sharp bends (5 minutes)
Store nylon rods straight when space allows. If coiling is necessary, use a loose loop at least 12 inches in diameter rather than wrapping the rods tightly around a small hook or bucket handle. Do not hang a full set from one end, since the weight can create a permanent curve.
Place the dry rods in a breathable fabric bag, ventilated toolbox, or container with air gaps. Keep them away from direct sunlight, hot garages, radiators, and heavy objects that could crush or kink them. Store connectors in a small pouch so threads are not rubbing against grit or metal tools.
Mistakes to Avoid
- Storing rods while wet: Moisture trapped in threads and brush bases creates odors and may corrode metal connectors.
- Using excessive drill speed: High speed can whip a flexible rod, damage the duct, loosen connections, or break the rod inside the run.
- Forcing a stuck brush: Pull back, rotate gently by hand, or separate the duct for access. Do not keep applying torque.
- Making tight storage coils: Small loops can leave a memory bend that makes the rod difficult to control.
- Cleaning with harsh chemicals: Solvents and concentrated cleaners may attack nylon and plastic fittings.
- Ignoring the connector: A clean-looking rod is still unsafe if its threads, coupler, or adapter are cracked or loose.
- Cleaning a live appliance: Unplug electric equipment and follow the manufacturer’s shutdown instructions before opening or disconnecting anything.
How Often
Clean the rods after every use, even if they appear fairly clean. Dryer lint carries oils and fine dust that can harden around connections. Fireplace and wood-stove work may require a second wash because soot is especially fine and can transfer to stored equipment.
Perform a detailed inspection before each use and after every long cleaning session. If the rods are used monthly, review the complete set at least once every three months. Rods stored in a hot, damp, or dusty garage deserve more frequent checks. Replace or clean the brush head whenever its bristles become matted, permanently bent, or too short to make reliable contact with the duct.
When to Call a Pro or Replace
Call a professional when a dryer vent is crushed, inaccessible, disconnected inside a wall, or heavily blocked; when a gas appliance connection must be disturbed; or when a chimney has tar-like creosote, structural damage, or an unknown liner condition. A professional is also the safer choice if you cannot determine whether the duct vents outdoors or if debris may contain mold, asbestos, or animal waste.
Replace a nylon rod if it has a crack, split thread, melted area, severe whitening, permanent kink, or a connector that will not stay tight. Discard a brush with a loose core or bristles that shed during hand testing. The cost of many consumer kits is modest—often about $15 to $35—so repairing a questionable rod is rarely worth risking a stuck tool or damaged duct.
FAQ
Can I put nylon duct-cleaning rods in a washing machine?
No. Agitation, heat, and detergent can bend or damage the rods and loosen brush components. Hand-wash them in warm water with mild dish soap, then air-dry them completely.
Can I use a drill with nylon cleaning rods?
Only if the rods and adapter are designed for drill use. Select a low-speed setting, usually around 250 to 400 rpm as a cautious starting point, keep the assembly aligned, and stop immediately if it whips, binds, or separates. Never use hammer or impact mode.
How should I remove soot or greasy lint?
Use warm water, mild dish soap, and a soft brush. Let the residue loosen for a few minutes instead of scraping it with metal. Rinse thoroughly and allow every piece to dry before storage.
Why did my nylon rod become permanently bent?
Common causes include tight coiling, being stored under weight, exposure to heat, or excessive force around a duct elbow. A slight temporary curve may straighten after loose storage, but a sharply kinked or cracked rod should be replaced.
Ready to decide? Our #1 pick for 2026 is the Clean, soft cloths.
Live price & availability on Amazon.


Write Your Review
No reviews yet. Be the first to share your experience!